Pages

December 25, 2010

A Very Merry Christmas to all................................

...................and a Happy New Year.  I hope everyone is celebrating and having a wonderful time with family & friends.  Lots of you food and good cheer to go around and reminiscing about Christmas' past.  Sounds like the best way to spend Christmas huh? 
Well I will be anxious after Christmas to read about all the wonderful things everyone got and stories to tell and of course the creations by the vast talent that is out there.


Well I just started my blog back in very late July, by the urging of a few of my message board friends and I can not thank them enough.  I so enjoy looking at everyone's blogs and learning so many new things and being inspired.  The New Year should bring us all more great wonder and blessing. 

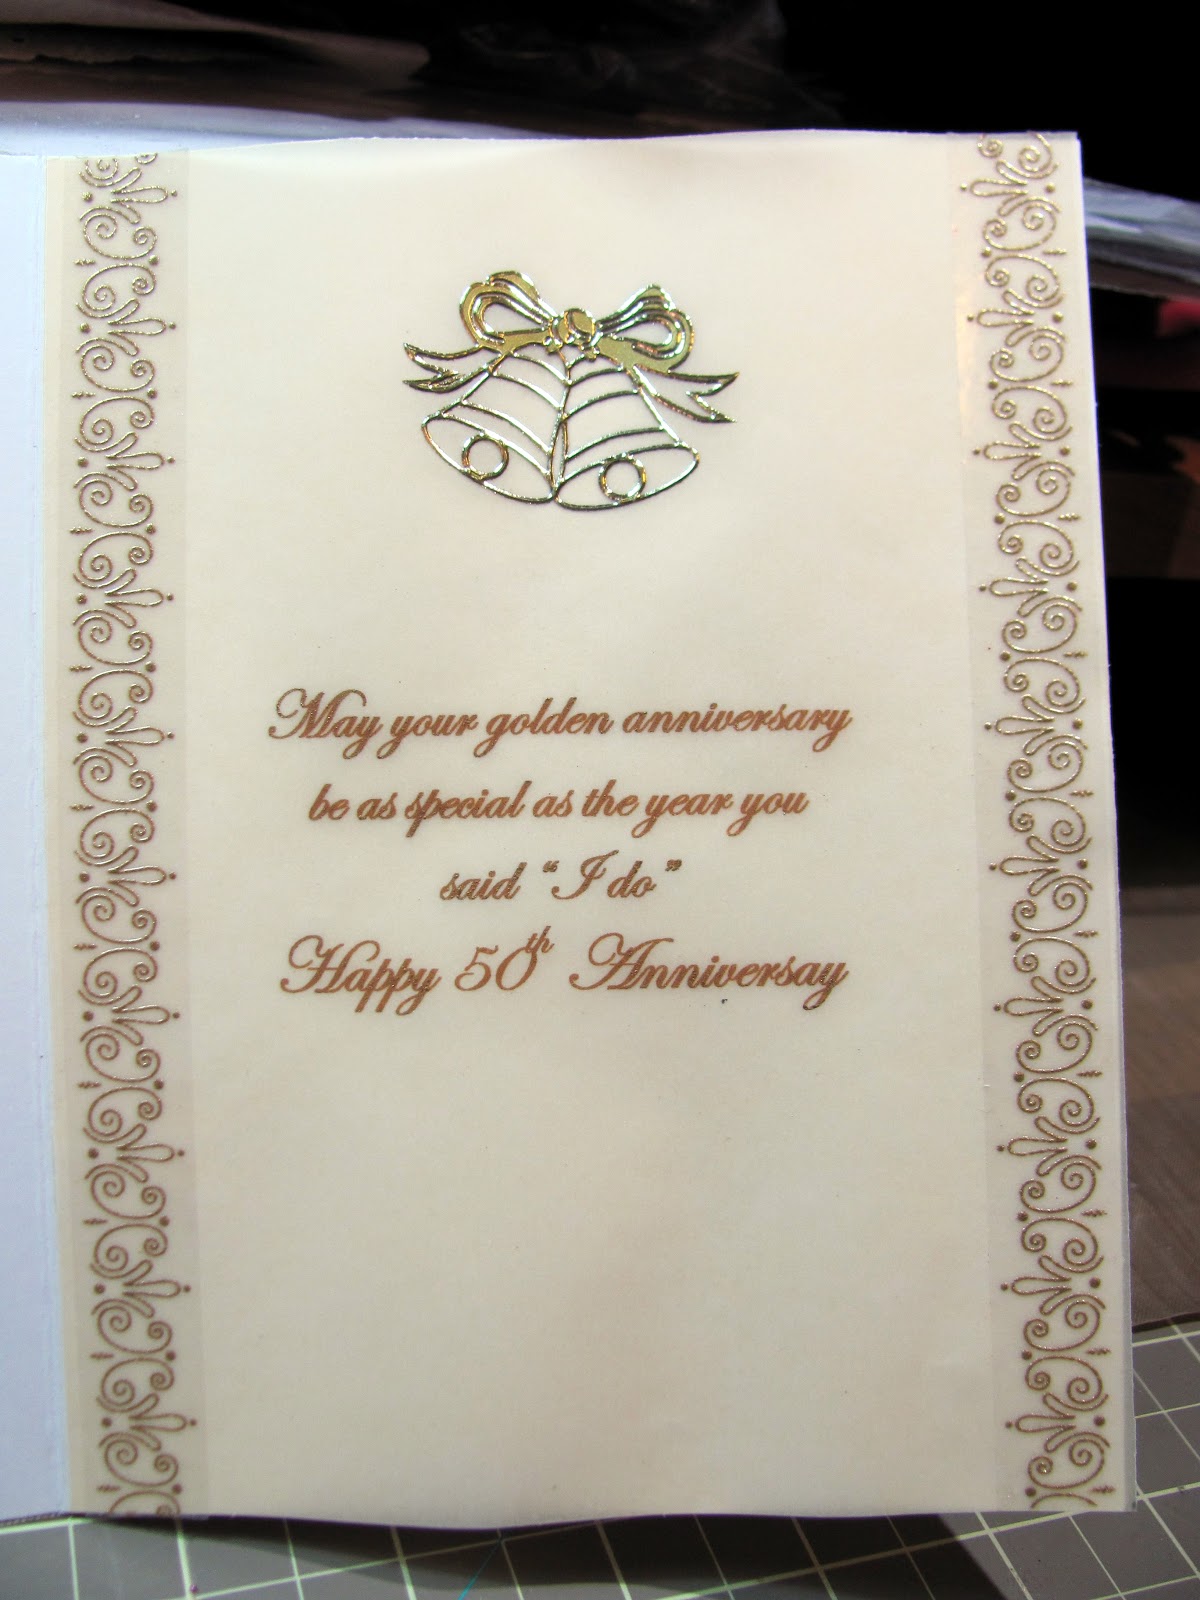
I just wanted to wish everyone a very Happy Holidays and a fabulous New Year.  I won't be around much for the next week as we leave tomorrow morning for Las Vegas, we are driving and am very excited about going over the new Hoover Dam Bridge.  AWESOME!  Also the main reason we are going is to celebrate our 25th anniversary which is on December 27th.  I am married to the most wonderful and understanding man!  So in a fit of hurry with all the Christmas stuff going on I made him this card.

It is such a beautiful card, only to be ruined by glue marks on the vellum.  I really wish there was a way to glue vellum as I love using it.  The more I tried to fix it the more I messed it up, so remember what I said about that understanding man (LOL) I sure hope he understands about the glue :)!  The glassed are from Sweethearts cartridge, that I cut from acetate and shadowed with a cream colored vellum, then I put Crackle Accents for the champagne.  Thanks for stopping by and have a New Year filled with good health and many many blessings.

December 23, 2010

A Fun Couple of Christmas Cards

During this past year I have managed to suck (LOL) two of my sister-in-laws into making cards.  Not too sure there DHs like me for it but it has been good for all of us in many ways :).  When I got my first Expression in November 2008 I packed up my baby bug and put it in the closet not knowing what to do with it, then a year or so later my one SIL (Turtlebug on the MB) said she wanted to start making cards, yeah my baby bug had a new home.  Then my other SIL (BingoLady) wanted to start making cards, first using just a Cutttlebug then when we found a CriCut Create on clearance at WalMart we could not resist getting it for BingoLady.  So now we all had Cricuts, then I thought I "needed" a new Expression and CricutMachine.com had a fabulous pre-Black Friday sale so I got me a new one and gave Turtlebug my old Expression.  So the baby bug is back in a closet again.  Well enough about the story of our Cricuts here is the special card I made for my two SILs.

I got this image from Tiffany Doodles if you like using digis stop by and check out what she has, there are some awesome images. They are slightly different, can you find the differences.......................well OK I will tell you.  There coloring is a little different, one has FunFlock on it antlers and the other has Crackle Accents on it's antlers.  I also added some white Fun Flock to his socks!
Here is a close of of the one with the Fun Flock
And just for added fun I put a red jewel on the his nose.  Did they come out cute?  Thanks so much for stopping by and would love to hear you comments.

December 16, 2010

My Christmas Tree................well half of one

I did not get anything made today, because I was putting up and decorating my Christmas tree, well half of one.  I wanted to share this with you, we live in a rather small place so we don't have a lot of room for a Christmas tree, however we do have a very large mirror above our fireplace.  Several years ago I bought this "half" of Christmas tree, well it is flat on one side, so we hung it on the large mirror and wal la we have a whole tree.
With the reflection in the mirror it almost looks like a whole tree.  It is decorated in all kinds of snowman ornaments only.  We also set up all different snowman decorations I had on the mantle.  Here is a straight on shot of it.
We stuck some glittery snowflake ornaments on the mirror with glue dots.  What do you think?  How do you like my Christmas tree?
Thanks for stopping by, I would love to hear what you think of my tree

December 15, 2010

A gift from Santa

I had bought a pack of K&Company Christmas paper and as soon as I saw this paper I thought of A Child's Year cartridge.  So I had this paper on my desk for a little over a week and finally today made a card from it.
The card measures 5 x 7 and the silhouette is a little over 4 inches.  At Jitterbuggin this week you were to make something with Santa on it.  Then with the help of one of the sketches at RAQs Challenge on the Cricut message board I came up with this card.  All the papers are from the same stack of paper.

Thanks for stopping by and would really like to hear your comments.  Welcome to all my new followers from the All That Glitters blog hop this past weekend.

ProMarker Giveaway........50 markers in all


ProMarkers Giveaway
You will love these markers, they have great colors and blend extremely well.  How do I know this, well back in November I won a complete set of 148 Markers from Enfys at Going Buggy.
Letraset had just set up a new blog, check it out here http://www.letrasetuk.blogspot.com and also a new website for purchasing  http://www.letraset.com/.  

Now I know you are saying why does she want to win more markers if I already have a full set, well if by some chance I do happen to win them I will do a giveaway on my blog and pass them forward.  How about that.

December 14, 2010

All That Glitters Blog Hop ................WINNER

Well I sure had a blast doing my first blog hop and I sure hope you all did also.  There was no much talent and inspiration along the way that I am sure I will visit these blog often.
To all who stopped by and took the time to comment thank you so much, I hope you visit again.

AND to all my new followers, thanks, I am honored that you thought my work was worthy enough for you to become a follower.  One thing you can be sure of is that each project I post will have my heart & soul put into each and every one.

Now..........on to the.........................Winner

Donna said...Donna - your card is gorgeous! Enjoying hopping with you.
Congratulations....................  email me your information so I can send you your sparkly prize package.
dmcervantez(at)gmail(dot)com  

December 13, 2010

All That Glitters Blog Hop ................Day 3

I made this snowflake a few weeks back and although it was not made specifically for this hop I thought it fit right in with all it's sparkle and glitter.  I also wanted to welcome all my new followers and offer a project to give them some inspiration.  This was pretty easy to make. 
This snowflake measures about 5 1/2 inches and was cut using Christmas Solutions cartridge.  It was all cut out of white paper, the blue pieces I sprayed with Glimmer Mist to give them that touch of sparkly color.  The white pieces are covered with Martha Stewart Crystal glitter.  The fun part about this is that it is mounted on a magnet sheet.  The word "snow" in the center is cut from Gypsy Wandering from silver holographic paper, and I inked the white with light blue.  Here is a close look of the "snow" and side view to show the dimension on this snowflake.
This blog was so much fun to participate in and once again thanks to Melissa and Booby for setting it all up.  ALSO I want to thank all my new followers and sure hope you will visit in the future and will enjoy what I create.  I only have one prize package to offer so I will compile the comments for all three days and pick a random winner.  I cherish each and every comments that is received, thank you everyone and look forward to seeing you in the future.
HAPPY HOLIDAYS TO ALL!

December 12, 2010

All That Glitters Blog Hop ................Day 2

I am having so much fun being a part of this blog hop, some of the other participates had projects planned for each day.  This was not a requirement and I had nothing planned to post on day 2 until Melissa our fabulous organizer came up with this "Twas the Night Before Our Blog Hop" that was absolutely too incredible to pass up making a project out of.  It needed to be showcased in some thing special.
We all know that Melissa is so talented in coloring with her Copic markers, but we had no idea she was a poet also.  This adaption of the old poem is just an unbelievable piece of work.  So I put it together in a frame made of green and very sparkly red glitter paper.  I added some glittery stickers around the sides and of course one of them is a sparkly red bird.  Melissa worked so hard to put this blog hop together and worked tireless to make it easy for all the participants that she deserves a big huge hug from everyone!  {HUG} we love you Melissa.
In case you can't read the words here is a copy of them.
'Twas the Night Before Our Blog Hop and all through the house not a creature was stirring not even a computer mouse.  The blogs were all typed up and prepared with great care in the hopes that blog followers would soon be there.  The projects were pictured and all snug in their blogs while visions of glitter danced in our nogs.  And Nana Donna in her first hop and I in my third had just settled our nerves after seeing Nana's amazing glittery bird.  When out in blog land there arose such a clatter, I sprang from my bed to see what was the matter.  Away to my computer I flew like a cop, tore open the laptop and opened the hop!  The moon on on the breast of the new fallen-shine, gave the luster of glitter on crafts so divine.  When what to my wondering eyes should appear, but a perfect project without the tiniest of smear.  With a number of bloggers, some old and some new, I knew in a moment our blog hopes had come true.  More friendships we formed and lasting bonds they became, and I whistled and shouted and called them by name; on Peggy and Donna, on Jill and Jennifer, on Jeannie and Sheila and Bobby and Summer.  On Melissa on Mary,  on Gaby, on Nana and Sherri to the tops of the blog lists, both large and small, now craft away craft away craft away all.   And away we went with heads held high after a successful hop had gone by.  But I heard us exclaim as we left all our sites the next hop will be better we will craft with all our mights.

December 11, 2010

ALLL THAT GLITTERS BLOG HOP!

It is finally here and I am so excited about this blog hop.  It is the first time I have participated in a blog hop so I am a bit anxious, but I am sure after it is over I will be hooked on hopping.  The theme of this blog hop is perfect for this time of year and besides who doesn't like a lot of glitter and bling, I know I do and I am sure you will see lots of it a long the way.  I feel very flattered  to be part of this extremely talented group of people and I can't wait to see what they have created PLUS besides all the inspiration there will be prizes at some of the blogs, maybe even all of them I don't know.  I am offering a small package of goodies so to qualify to win my package please leave comment on this post, becoming a follower is not a requirement but I would really be delighted if you did.
So on to my project I created.....................I made a card that has a lot of sparkle and also has a pull out ornament.
Photobucket
The white circle is a cut from Cindy Loo cartridge cut twice with the second one flipped.  I covered both birds with Martha Stewart Garnet glitter, after it dried I glittered the rest with Martha Stewart Fine Crystal glitter.  Very hard to see the sparkle but it is there.  I welded a ornament hanger from Christmas Noel cartridge so I could put ribbon through so it could be hung up.   Then using the shadow feature for the same cut on the Cindy Loo I cut it from clear acetate, so I could glue the glitter pieces back to back on the acetate. 

Gluing something like this on acetate is rather challenging as it slips and then you can see it, so I dabbed glue all over the acetate and it gave it the look of an ice crystal window effect.  Pretty good cover up for a mistake. LOL
The red background paper I stamped using Versamark Dazzle with a star stamp to just give it a watermark look, then when I glued the glued on the front I left a pocket for the ornament to slip into.


I even finished the inside, (this is unusual for me) using a frame from Stretch Your Imagination, then cut the bow frame out of the same gold as the front, also from Stretch Your Imagination. 

The card is 5 1/2 inch square card and the ornament is just under 5 inches.  Here is the card with the ornament taken out.

Thanks, and don't forget to leave a comment for a chance to win my small prize package.  I will pick a random winner on Tuesday,
Now here is you next stop.....


Cardz TV 


And in case you get lost along the way here is a list of the blogs.
A Place For My Cards
CardDreams by Nana Donna   You are here
Cardz TV
The Cricut Couple
The Cricut Diaries
Daily Grace Creations
Gaby Creates
Love, Laughter, and Creations
MelissaMade
She's A Sassy Lady 

Thanks Melissa and Bobby for coming up with this hop and inviting me to join.  And a big thanks to Melissa for all the "extra" help or my post would never had made it up!
Thanks for hopping along and have a sparkly, glittery Holiday season!

December 8, 2010

Heartfelt Creations Stamps Card

This is my first time using these stamps and matching dies.  They are fabulous!  I did not have a lot of time to make this card as my stamps and dies just came in and I wanted to make a card for the challenge At Joan's Garden.  There is a great prize package of a whole bunch of these stamps and matching dies.  So here is my first card, be easy on me LOL, I did not have as much time as I usually like to work on my cards.
I am sure I will improve as I use these more and get used to them.  I am also so very new at coloring with my Promarkers.  This card also followed one of the sketches this week at RAQs Challenge on the Cricut message board.
Thanks for stopping by.

December 7, 2010

Santa - MCPT Colored

This Santa was colored using my Prisma Pencils and Odorless Mineral Spirits, well not much to color on him.  I used the pencils on his hat, face, holly and also the Merry Christmas.  I put white Fun Flock on his hat.
Aprile on the Cricut message board sent me this image to color and create a card, this was the image for the November Challenge, I guess I am a little late :(.  I also designed this card following the sketch at the Mojo Monday challenge this week.  I loved this sketch it was fun to follow and only took me about 2 hours, and if you know me that is pretty amazing!  The ornament is a Anna Griffin sticker that I got at Michael's.  The background paper is from a K & Company Christmas stack that has some very vintage looking papers that are double sided.  This Merry Christmas paper fit perfect.
I did the inside rather simple, using the same background paper.
Thanks for stopping by, hope you like my card and would love hear your comments.

December 6, 2010

All That Glitters Blog Hop ................

......coming this weekend starting Friday December 11th going through Sunday

I am so excited about this up coming blog hop.  It will be my first time being part of a blog hop and judging by who is participating in it you won't be disappointed in the creations you see along the way.  You are sure to get some inspiration and maybe even win some prizes too!  Come on it won't take too long, it is a small hop, there is only 9 stops.
What better way to celebrate this season with lots of bling, sparkle and glitter and boy these gals have it!   If you want to check out the list of very talented participants click this link All That Glitters.

December 5, 2010

Birthday Prize package Wow

Just look at this prize package, it is one of the biggest  I have seen, stop by this link and check it out.  Cabios Craft Corner Birthday Candy

December 3, 2010

50th Anniversary Card

Tomorrow we are going to a 50th anniversary party for a school mate of my husband.  So here is the card I came up with.
 The card is 5 x 6 1/2, I covered the base card with holographic gold paper, then I stamped with a script background stamp on light golden vellum and heat it embossed it with gold.  The cake was cut from Paper Doll Dress up and is about 5 inches high.  The cake in cut out of white glitter paper, then I covered the "frosting" with gold Perfect Pearls and Diamond Glazed over the top to make it look more like it was thicker or raised.  The "50" is cut from the font on Cindy Loo out of the same holographic gold paper.  I bought some self adhesive Martha Stewart strips that I stuck on the cake as decoration, then finished off the swirls with a few red pearls.
It is very shinny and pretty in person, one of those that just does not photo too well.

The inside I printed the verse on the same vellum, then added some of those Martha Stewart strips down the side.  The bells are a sticker.

Thanks for stopping by.

December 2, 2010

Finally Organized my Cartridges

Here is one of the reasons I have not got much card making done lately.  I have been after my son (a carpenter) to make me a customized table/shelves to hold my Expression and my cartridges, well ya know Mom is always on the bottom of the list :(.
So here is what we came up till that cabinet get done (ha ha ha) but it works great.
It is a "media storage" unit that sits on a swivel base,  Each shelf holds 5 cartridges and it is perfect for me for storing my cartridges.  I am one of those that like to keep my cartridges and their books in the box.  I have my solutions cartridges stacked on the bottom shelf.  Here is the other side when you spin it around.
I thought I had too many cartridges, hmmm looks like I have more room,,,,,,,,,,,,,,LOL.  My sister-in-laws have a few on my cartridges (they are just getting started so I let them borrow my cartridges) but I have them linked to my Gypsy so I can still use them.   I have my Cricut markers and my Cri-Kits pens on the top shelf on this side.  Pretty cool huh?  I love it, it is perfect for me.  I got it at my grocery store (Fry's) and it was pretty reasonable.  
Here is what it was like before

Thanks for stopping by............................And hey my followers are climbing  wooo hooo how exciting, something may happen when I get to 100 followers.  :)!

November 30, 2010

................And through the woods Christmas Card

.....to Grandmothers house we go
----------oops undated link to card using the same cut----------
I have had my Cricut Christmas Cards cartridge for a couple of months now and have left in sitting on my desk because I wanted to make one of the these cards.  Well yesterday I finally got around to it.
I chose a blue snowy looking background paper.  I cut the rest of the card from pearl like cardstock.  Cuttlebugged the light blue frame with D'vine Swirls to match the background paper.  The "village" in the background I inked the edges of the building to give it more definition.  Pop dotted the carriage and horse.   This cartridge sure makes cards fast and easy.
Funny because I just stopped by at the Cricut Diaries blog and she made the same card.  Great minds think alike, but check hers out same card but different.  I may have to steal her snow idea and add it to mine LOL
Thanks for stopping by would love to hear your comments.

A Green version of my Christmas Card

Last week I posted a picture of my Christmas card in red & gold.  I like to make all my Christmas cards (50) mostly all the same so I don;t get confused from year to year LOL.  So here is a green & silver version of my 2010 Christmas card.
A refresher in case you don't remember the red one.
I will probably make several of both, but which one do you like better?
Let me know, thanks for stopping by.

November 29, 2010

Hello Teapot card

After winning my set of 148 ProMarkers from Enfys at Going Buggy I finally got a project made using them.  And I have to tell you I love coloring with them, they blend incredibly well and the color spectrum is vast, click HERE to see a color chart. 

 The image is a digital image from Whimpsy Stamps  if you are looking for some great digital images check them out they have some fabulous designers, they also sell rubber/clear stamps if you prefer that.   I colored the Teapot using Yellow, Soft Lime, and Primrose starting with the darkest on the outside then Soft Lime and finally blending back into all the colors with Primrose, finally I went over the middle area with the blending pen to make sure it was all blend and to remove a slight bit of color.  I used the same method for the rose/flowers using Mango, Peach and Oatmeal for the blending.  Now I had this beautiful Teapot colored and was trying to figure out what kind of card I wanted to use it on then at My Sheri Crafts the challenge this week was to make a "Hello" card, it was the perfect fit for this teapot.  The hello is cut from Cindy Loo cartridge.
I mounted the cut out teapot on a piece of peach paper and them cut around to leave a border.  The card is 5 1/2 inch square, and the green background paper is from K&Company.  I pop dotted the teapot to mount it on the card.
Here is a close up of the flower

I had a very hard time getting a picture that showed the true colors.  I covered the flower with Diamond Glaze.  You can't see it but I printed the image on Cryogen White paper from Paper Temptress it is so pretty it has a slight sparkle to it that you can see through the coloring.  This paper is great for coloring with alcohol ink markers, they blend very smoothly and hold the color so it doesn't bleed outside your lines, very slight blending out the back of the paper, but that was probably me adding too much color.  Still learning how to use these markers but am very please with how this one came out. 
Thank you so much for stopping by and I would love to hear what you think of my first project with my ProMarkers.

November 28, 2010

Stylish Blog Award.........Thank You!


WOW, I am so honored to receive this blog award and I could not believe it when I received it TWICE.  Thank you Charlotte at A Liitle Bit of Detail and Angel at Owl Bee Scrappin for thinking of me and awarding me this badge.  I sure hope you don't mind that I combined these two and pass it on that way.  I always am very delighted when someone enjoys my creations enough (and this case stylish) to give me one of these rewards.

Ok so this is how this award works, I love the part about telling 8 things about yourself as they makes it possible to learn more about each other.

1. Thank and link back to the person who awarded you this
2. Share 8 things about yourself
3. Pay it forward to 8 bloggers that you have recently discovered
4. Contact those bloggers and tell them about their awards
 
8 THINGS ABOUT ME.....................
1)  I am married to the most wonderful man that spoils me rotten
2)  I am unable to work because of a spinal cord tumor, however that made it possible to work on my cards all day :)
3)  I love making cards and have been for 15+ years and have a paper addiction LOL
4)  I have 2 grown children and 4 grown step-daughters
5) We have 9 grandkids and some great-grandkids
6)  I have a great-granddaughter to arrive in January (this will be the first from my children)
7)  We love to travel, and no matter where we go the road somehow leads to Las Vegas
8)  Love to sit out on our front deck in the evening and have a glass of wine!

Now for the bloggers I would like to pass this award to, some are not newly found but they are all fantastic and worth checking out:


November 24, 2010

Red Hot-Chili Happy Holidays

This will pretty much be my Christmas card this year.  It is made following a sketch at Mojo Monday.  I twisted it up a bit with the bow being at the top of the chilis.
I had bought this string of Chili stamp years ago with the intent to use it on my Christmas card, I means 10+ years.  Well finally it will make in onto my Christmas cards.  It is a Comotion Rubber Stamps stamp, they unfortunately are no longer in business.    It is stamped and heat embossed with Stampendous Red Dragon embossing powder, it is sparkly.   
The inside (not done yet) will say  "CHILI? Warm Holiday Greetings" I was pretty happy when I found that just last year I believe.  

Thanks for stopping by and would love to have you drop me a comment :).

November 23, 2010

Diamonds are a Man's best friend ?

This card went together very fast for me (about an hour) that in itself is amazing LOL.  Not much Cricut just the diamonds from George.
Lots of Cuttlebug, well some...........I Cuttlebugged the red & purple diamonds with Argyle folder and the background paper with a checked foldr that came in one of the sets.  The card is 5 x 6 1/2.  I thought it made a great male card.  Thanks for stopping by.

November 22, 2010

Sparkly Christmas Tree

This was a fast simple card but it has a lot of impact!  I made it following a sketch this week on RAQs Challenge.  This is one of those cards that wakes you up and says "wow I, didn't remember that cut being on that cartridge".
This card is 6 1/2 x 5 inches and the Christmas tree is cut at about 6 inches.  It is cut from Lyrical Letters cartridge.  In Design Studio I added a small box for the trunk and welded it to the tree.  I cut this from red paper and glittered it with Martha Stewart garnet glitter.  Yesterday I buried covered in glitter.  I had my fan on when I glittered Oops!, not too smart LOL.  I then mounted the tree on a piece of paper from My Mind's Mine Christmas tack that I got on Sunday at Michaels.
Thanks for stopping by and hope you like this simple fast Christmas card.  Anything fast tihis time of year is great.

November 20, 2010

Big Girl Panties

Thanksgiving day is my daughter's birthday and she will be 39, wow she is old,  not me LOL!  Although her card has nothing to do with the Thanksgiving theme (I am sure she will glad it doesn't) it does fit into "her" theme.  I made this card following a sketch this week at RAQs Challenge on the Cricut message board, I thought the sketch fit into this perfectly or vice-versa.
The "outfit" is mounted a 5 x 7 piece of charcoal colored paper that has a slight weave like pattern on it.  The outfit opens for the card, which you will see later.
Now I bet you are wondering what does this have to do with a birthday, well once you see the inside you will understand.

I bought this stamp a while back with my daughter in mind.  It is a phrase she uses now and then plus it fits her personality.  Now isn't it cute how the cards goes with the stamp?
Using my Gypsy I set up the base for the card by using a rectangle from George and welding the panties from Paper Doll Dress Up.  Here is how it looked on my mat.

I folded it so the top matched just above where the panties are, I also cut out the same size panties from plain white(2) and red polka dot paper.  I trimmed the front above the panties to look like a waist line and glued on the black polka dot paper on the top and trimmed it the same.  After that I cut the oval using my Nesties to make the neck.   I glued the white ruffle ribbon on the bottom of the legs then glued the red polka dot pantie onto a plain white one to hide the ribbon I had wrapped around the corner.    The "buckle" is a button that I wove ribbon through then attached around the back and covered it up with the other plain white pantie.  The buttons are actually buttons that I cut the back off of and glued down the front.  Here is a picture before I mounted the card onto the charcoal paper and before I put the buttons on.
I just love how this turned out, I think it is so cute, and believe it or not it only took me about 4 hours total.  That is lighting speed for me.  LOL 
Well thanks for stopping by and let me know what you think.  Sorry if I bored you with all the details I am not very good at that part.

They Arrived!!!!!!!!!!!!!!! My Promarkers (BIG smile)

I am still so exciting about winning a complete set of 148 Promarkers from Enfys at Going Buggy last week I can hardly believe it. Thank you thank you! :)  Well when they arrived yesterday it was amazing, now I am really overwhelmed look at this box of markers!.................
OMG, that is a lot of markers, now I have to put them all away in these handy little holders that Letraset Promarkers sent me along with my markers.
What a job, there are so so many colors and trying to get them organized into the correct color families was a feat.  Some look green but should be in the yellows, Oh my, I guess I will print up Promarker Color Chart and follow that.  If you want to see the colors click the link above.  Here are all the markers in the holders, now there are 13 holders and I have to figure out where to store them.

I kind of like the holders, they each hold 12 markers so when you are working on reds you can just grab your red holder.  Now let's face it, it may be kind of hard to have ALL 148 markers on your desk at one time YIKES!  They even sent me 8 extra markers, they were duplicates of some of the colors, I will have to contact them and see if that was an error and if I need to send them back.  Talk about sending, wow what fast service from the UK.  I won on Monday 11/15, they shipped them on Tuesday 11/16 and I received them Friday 11/19 that is impressive!  So if you want to order some you will know what kind of service you will get from Letraset.  You can also order them from Carpe Diem  that has them for $1.49 each.
Now keep this in mind that I need a lot of practice with coloring using alcohol markers but here is my first coloring job, it is not finished and I will put it on a card but wanted to show you the vibrant colors these markers have.  I love these markers they go on smooth and quick, now they are not refillable like Copics but with the price of $1.49 it is far cheaper to just buy another marker then to buy a bottle of refill.  Also when you get a new marker that means a fresh nib/tip every time.  Makes a lot of sense to me.  Without further ado...
Enfys at Going Buggy has some videos on coloring with the Promarkers, it appears may be I should watch them again and again.  LOL
If you are in the market for Copics, check out these markers, they are fabulous and a lot more inexpensive, you can get 3 of these markers for the price of 1 Copic, that means more colors in your collection :).
Would love to hear your comments and/or tips on coloring with these.
Thanks for stopping by.

November 18, 2010

WOW check out ths blog Candy

Boy Angela at Angelwood Crafts is giving away this fabulous blog candy for her birthday.  If you are a fan of coloring with Copics or Promarkers (can't wait till mine come) then you will love this package with all the stamp images.  Just take a look at it you will want to sign up for this one for sure.  Check out this pickture.
Here is a list of what is in it.

Magnolia stamp - Tilda With Birdcage
Magnolia stamp - Dangling Tilda
Magnolia stamp - Wedding Singer Tilda
Inky Impression stamp - Cowgirl Lili
Sweet Pea stamp - 1 stamp unmounted from Plate 21
Sugar Nellie stamp - Blossom
Bildmalarna stamp - Wedding couple
Paper Makeup stamp - Swirlie tree
K&Co Mat pad - Berry Sweet
K&Co cupcake embellishments
Cookie cutter button embellishments
Various colored stick on gems

November 17, 2010

Birthday Princess Card

One of our Granddaughters turn 17 tomorrow.  She thinks she is Papa's princess (well aren't all granddaughters princesses :) so I thought I would make her a princess card.  I made this card following the sketch this week at Mojo Monday, I love this sketch.   I sure wish the pictures would should the colors better.

The card base is a very pale pink, and the chocolate color is pearlesence like paper.  The crown is cut from Gypsy Wandering cartridge at about 2 inches and the birthday princess is from Birthday Cakes.  I cut it twice and layered them.  The top layer I covered with Diamond Glaze, the paper it self is Cored'nations glitter card stock and the glitter shows through the glaze.  I added some bling to the band on the crown and also along the top.
The bow I made using the "tye a bow on a fork method" and left it with some extra loops, also added some bling to the center of the bow. 
The inside I printed the sentiment on vellum paper and then immediately sprinkled embossing powder on it when it came off the printer (seconds are crucial for this to work) and heat embossed it.  Added a couple strips down the side punched with a Martha Stewart punch.
Thanks for stopping and by and remember I love your comments or if have any questions just ask.

November 15, 2010

148 Promarkers I WON!!!

What a fabulous wake up I had this morning........................I found out I WON this wonderful prize from Enfys at  Going Buggy and Letraset.  I am beyond excited I can hardly type.  I think 10 is my lucky number LOL.  I look forward to getting these.  I really want to learn how to color with the markers and make gorgeous things like Enyfs and also Melissa she is awesome at coloring with alcohol markers.  I have a lot to learn, I will be watching the videos that Enfys made.


Enfys at her Going Buggy is giving away a complete set of Letraset Promarkers, that is right an entire set 148 markers.  Bot would I like to get my hands on these.  She will also be doing some videos on how to color with them, she makes some amazing creations so I am sure we will all learn something from her videos.  Here is what you have to do to enter....................