I am super excited about this special card. In February I was blessed with a great-granddaughter, she is just adorable and I have been trying to make her mementos for her first year. For Halloween she will be dressed as a ladybug, she is a very active 9 month old but not quite walking yet so trick-or-treating will have to be done via the stroller. But at the rate she is going she will be walking by Thanksgiving, she has taken a couple of steps and tries very hard to walk.
So here is that very special card.......................
I cut the "person" and the ladybug outfit from the Paper Doll Dress Up cartridge. She is about 6 inches tall so I had to make a half sheet size card. I then had to find a picture (we have tons to chose from LOL) that she was facing forward, I had to print it until I got it the right size. I covered the ladybug part with red flock so it is fuzzy looking and added some black dots that I had. The shoes are cut from glossy black cardstock so they look like pan-ten leather. The spider web, spider and trick or treat bag were also cut from Paper Doll Dress Up. The web was misted with Glimmer Mist so it has a sheen to it. I even snuck my new MS drippy goo punch in there along the bottom
The trick-or-treat back had the words cut into it but did not show up too well, so I set it up on my Gypsy and "cut" it first with my Quickkutz pen in the blade housing then, returned to the design put the cutting blade back in and cut it out. Now the words showed up better. Then I covered to whole thing with glossy accents. This card was made following the sketch this week at Mojo Monday #212. I was so happy when I seen this sketch as I knew it work perfectly for this card.
Now I thought I am going to have to make the inside special also, so here is what I came up with.
I covered it with the same background paper as the front from the DCWV Halloween/Fall stack. Then I went hunting on the internet for a sentiment to use of the inside. They were all scary and way to old for a small baby so I took a few of them and along with my own ideas put this one together. Now lately I have been working a lot with the hinge method to use my Cricut to cut out around things that have already been printed, but until now the shapes were simple, circles, squares etc... This time I went a bit out of the box and cut this cute ghost around my sentiment.
This card has been in the making for several weeks and has changed courses so many times, trying to evolve around the ladybug but in the end I am very very happy with it.
Please leave me a comment on what you think of my Halloween card. Thanks for dropping by.
Challenges for this card
Make it Monday Always anything goes ends - 10/30
More than Favors Anything goes ends 11/1
Scrapbook Sisters Anything goes ends 11/7
Inspire me Friday Link poarty anything goes ends - 11/4
Shellys Images Tic-Tac-Toe (Twine - Free - Punches drippy goo) ends 10/30
I have been doing some kind of craft or another most of my life. My greatest craft love is making cards, which I have been doing for 18+ years. I love having a blog to share my creations with you and hope to inpsire you to create something. Thanks for stopping by.
Showing posts with label Paper Doll Dress Up. Show all posts
October 27, 2011
December 3, 2010
50th Anniversary Card
Tomorrow we are going to a 50th anniversary party for a school mate of my husband. So here is the card I came up with.
The card is 5 x 6 1/2, I covered the base card with holographic gold paper, then I stamped with a script background stamp on light golden vellum and heat it embossed it with gold. The cake was cut from Paper Doll Dress up and is about 5 inches high. The cake in cut out of white glitter paper, then I covered the "frosting" with gold Perfect Pearls and Diamond Glazed over the top to make it look more like it was thicker or raised. The "50" is cut from the font on Cindy Loo out of the same holographic gold paper. I bought some self adhesive Martha Stewart strips that I stuck on the cake as decoration, then finished off the swirls with a few red pearls.
It is very shinny and pretty in person, one of those that just does not photo too well.
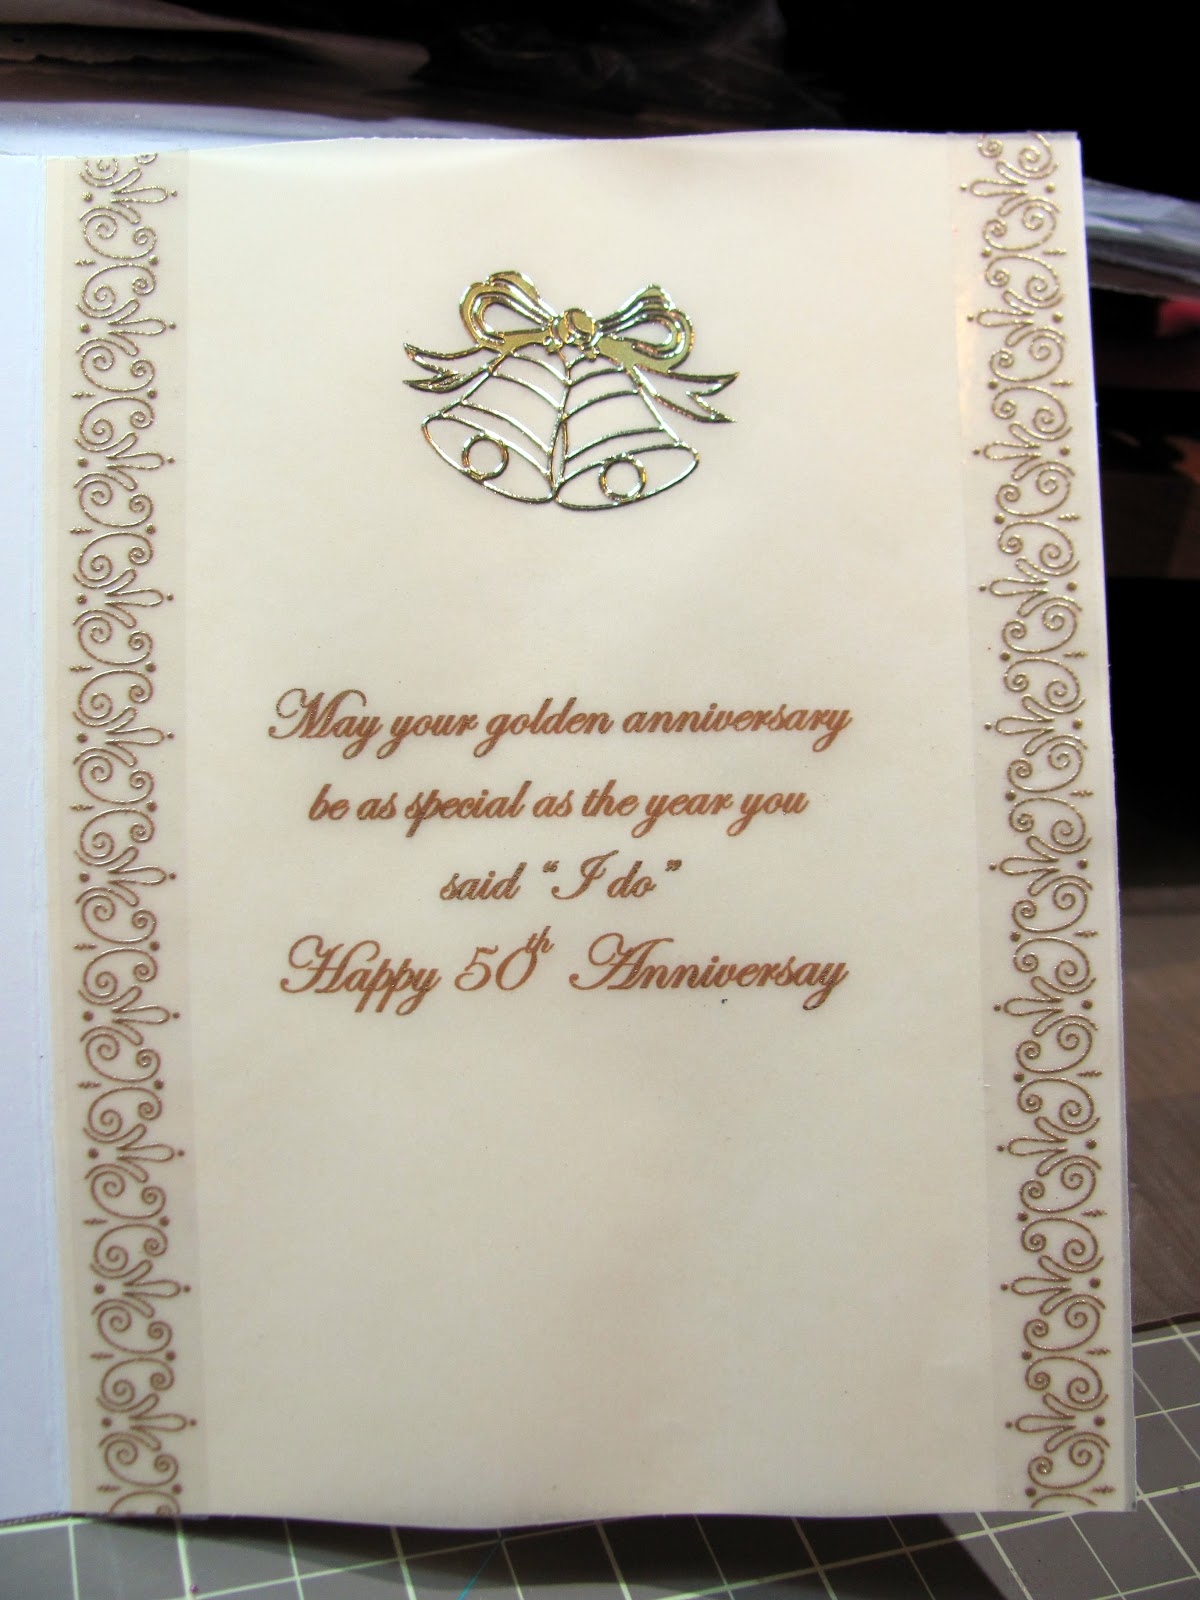
The inside I printed the verse on the same vellum, then added some of those Martha Stewart strips down the side. The bells are a sticker.
Thanks for stopping by.
November 20, 2010
Big Girl Panties
Thanksgiving day is my daughter's birthday and she will be 39, wow she is old, not me LOL! Although her card has nothing to do with the Thanksgiving theme (I am sure she will glad it doesn't) it does fit into "her" theme. I made this card following a sketch this week at RAQs Challenge on the Cricut message board, I thought the sketch fit into this perfectly or vice-versa.
The "outfit" is mounted a 5 x 7 piece of charcoal colored paper that has a slight weave like pattern on it. The outfit opens for the card, which you will see later.
Now I bet you are wondering what does this have to do with a birthday, well once you see the inside you will understand.
I bought this stamp a while back with my daughter in mind. It is a phrase she uses now and then plus it fits her personality. Now isn't it cute how the cards goes with the stamp?
Using my Gypsy I set up the base for the card by using a rectangle from George and welding the panties from Paper Doll Dress Up. Here is how it looked on my mat.
I folded it so the top matched just above where the panties are, I also cut out the same size panties from plain white(2) and red polka dot paper. I trimmed the front above the panties to look like a waist line and glued on the black polka dot paper on the top and trimmed it the same. After that I cut the oval using my Nesties to make the neck. I glued the white ruffle ribbon on the bottom of the legs then glued the red polka dot pantie onto a plain white one to hide the ribbon I had wrapped around the corner. The "buckle" is a button that I wove ribbon through then attached around the back and covered it up with the other plain white pantie. The buttons are actually buttons that I cut the back off of and glued down the front. Here is a picture before I mounted the card onto the charcoal paper and before I put the buttons on.
I just love how this turned out, I think it is so cute, and believe it or not it only took me about 4 hours total. That is lighting speed for me. LOL
Well thanks for stopping by and let me know what you think. Sorry if I bored you with all the details I am not very good at that part.
October 7, 2010
Trick or Treat Ghost........
Well you know I never really make Halloween card unless I am challenged to! As most of your know I try and participate in RAQ's Challenge on the Cricut message board every week, this week Sherri at the Jitterbuggin Challenge is hosting RAQs challenge. One of her sketches is also for the Jitterbuggin Treat or Treat special challenge where you can win a Cricut Lite cartridge of your choice. Anyone can participate so check it out, then on Saturday voting will begin for the winner, I would love to have your votes :)! The challenge was to use the sketch to make a Trick or Treater using two cartridges and have a star somewhere on your card. See it that little blingy one next to the moon? The Ghost is cut from Paper Doll Dress Up and his bag is from Doddlecharms. The tree and moon I cut at 3 inches from Celebrate with Flourish, I am loving this cartridge more and more however it will not cut using Design Studio, I guess there is an issue with that.
I also posted this on the Sunday weekly challenge Stamptacular Sunday , where the theme is "Layer-it-on", you can use any theme or colors you wish but there must be at least 5 layers and have stamped something. This card is actually about 8 layers, wow I couldn't believe it either till I counted them. The "Trick or Treat" is stamped and heat embossed.
I just love the way it came out, I think it is so cute. The Boo and black cat are a Jolee sticker. It has so much dimension in person here is a close up of the ghost. He is two layers pop dotted. I accented him using watercolor crayons and a blender pen. I had the hardest time coloring the pimpkin face on his bag as the paper is holographic and nothing would dry on it, I finally just used a Micron pen and that stayed on.
Let me know what you think, and stop by Jitterbuggin Challenge I would love to have your vote......... I would love to read your comments Thanks
September 6, 2010
Trick or Treat
You know I have never made a Halloween card before because I thought "who am I going to give a Halloween card to?" Well at RAQ's Challenge this week one of the extra credits was to make a holiday card, any holiday, I recently got DCWV Autumn stack and there were a couple Halloween papers in there, so I thought I would give a Halloween card a try.
I am so so excited on how this one turned out, it is so cute! The background web paper is from that DCWV stack and so is the "trick or treat" and I faux stitched with a white open around the edges. The Happy Halloween is cut from Wild Card out of holographic paper, the same orange paper that is behind the trick or treat. The white strip that goes across on an angel was just a piece of white card stock but I wanted it to be a little glittery so I had some diamond colored fabric glue so I spread it on the paper and it came out great. Because it was fabric paint it left the paper very pliable. I think I discovered something new :)!
The Mummy I cut from Paper Doll Dress Up at about 2 1/4 inches and inked his wrapping lines with gray ink to highlight them, added him some black pearl eyes.
The spider and web were also cut from Paper Doll Dress Up at about
1 1/4 inches. The spider is cut twice from black glossy paper and then pop dotted on top of the web. I hung him from a piece of very light gray sheer ribbon to look like he was hanging from a web.
I hope you like him as much as I do, almost to much to give away LOL, but I do have someone in mind to send it too!
Subscribe to:
Posts (Atom)