Pages

December 7, 2017

Silver & Gold Christmas

Gosh, has it really been that long since I posted last? 😏
Well Thanksgiving time kept me pretty busy, then
I had a surprise visit from my son and his fiance, it was a 
fabulous surprise and it was so nice to see them.  
Once I got back to crafting after all that it took me a bit to get rolling again.

I was able to get this Christmas card done using Unity stamps
and "no red or green" for their current challenge on Facebook.

Every year I usually make a Christmas card without the traditional
Christmas colors, but for some reason, this one stumped me
until I ran across this beautiful papers that my son-in-law 
had given me.  He works in a print shop and everyone while in a while
he will bring me some fabulous papers.  The silver paper on this
card has a metallic pearl-like finish to it and the gold is very
sparkly.   I stamped the tree and the saying using Versamark
ink pad and then embossed with a golden champagne-like color.
Both of the stamps are from the September Kit of the Month
from Unity stamps. Now parts of the merry didn't stamp out
all the way or very clear but that is the way the stamp
was made, it kind of messes with my OCD on everything
be stamped perfectly.
I embossed the silver panel and then added a  strip in
ribbon/chain along the side of the card.

Thank you for stopping by, I am so behind on my Christmas cards
I really need to get going. 

November 16, 2017

Fall Candles

Hi back to share a different kind of project for me, it is
not a card...................

I had done this many many years ago when I first started on my stamping journey, probably around 1996 and had forgotten about
it till I recently seen someone make one.  
So the challenge right now over at the Unity Stamp Facebook
Show & Tell group is to create something other than a card and thought
well, this is the perfect time to make some of these again.


I stamped on tissue paper using a couple of the stamps that were in
the August 2017 Unity Stamp KOTM.  I then colored the images
using my Copic markers and trimmed the tissue paper so there was not a whole bunch of extra around the image but not as close as fussy cutting.  You have to be a little gentle as to not tear the delicate tissue paper. 
 I had bought a two pack of plain white wax pillar candles. Using my Ranger heat tool I gently heated an area of the candle them placed the colored
image over it, it will not all stick down yet I just do this so it stays
in place till I move to the next step.  Then once it is right where I
want it to go, I continue to heat over the image moving around the heating tool because you do not want to over melt the candle.  Just keep heating
and moving around the heating tool till the tissue paper edges seem
to disappear into the candle.   Then I placed my second leaf and repeated
the process and that is it.  It is actually pretty easy.  I suppose
you could use a hairdryer if you don't have a heat tool.

I added some twine and buttons to the bottom to dress them up a bit.
I will take these to my daughters for Thanksgiving so she can
use them as decorations, or burn them if she wishes to.
          They would make great gifts for the holidays and so easy to make,
 the possibilities are endless.   In fact, it will be
on my gift giving list this year. 

               Unity Stamps is having a huge sale right now so if you have
had your eye on now is the time to pick up those stamps. 

November 15, 2017

Snowman Couple

Hi, it is that time of the month again (oh no not that time lol)
for the Bugaboo Crafty Challenge over at the 

Each month starting on the 15th we have a challenge that is 
sponsored by Bugaboo where you just need to color up a
Bugaboo image and enter it in the challenge. 
Don't have any Bugaboo images, no problem Bugaboo offers
                         a freebie every Friday and if you look around I am 
                                sure you will find some images you like. 

So for my card this month I chose to use this adorable little

 Aren't they just the cutest?  Well there is a reason I chose this image
beside their cuteness is, recently my son got engaged and I thought this
would make the perfect Christmas card to send them for their
1st Christmas as an engaged couple. 
I struggled so much on how I wanted to do this card, first I was going to
put them in a snowglobe and make a shaker card, but decided not too
because I didn't want them to be covered with things.
I was trying to keep it rather simple.   I randomly stamped on white paper
with a couple of snowflake stamps from the October 
Unity Kit of the Month and also some Hero Arts stamps
then I heat embossed them with white glossy
embossing powder.  
I colored the snow couple using my Copic markers and accented with some
glitter pens on the ornaments.  Her hat I added white fluff to
the band and the ball on the top, a couple details that are hard
to see in the picture.  Then I cut the image out using a
Gina Marie die that actually embosses the edges.
I then created a label in Cricut Design Space and wrote
out the Merry Christmas using my Explore and a black
Pilot Precision V5 pen.  Then fit right in your Explore
and I love the fine line they write with.
I pop dotted both the image and the label to give it some dimension.

Well thanks so much for taking the time to stop by and visit my
blog.  Head on over the Bugaboo Crafty Challenge and join in
the fun. 

November 5, 2017

Coloring on Red

                    You know all the rage right now is coloring on kraft cardstock me
included love it.  I love the look, I love the way the color lays down, 
I just love everything about it. 
So I recently ran across where someone colored on colored paper,
I believe what I saw was blue.

Well I recently got my Perfect Poinsettia set of stamps from
Gina K so I thought it would be perfect to give it a try
to color on red.  So for my project this month over
at the Crafty Awesomeness Challenge I made this card.


I stamped the poinsettias and heat embossed them in gold.  This set
of stamps is actually a multi-step set of stamps, much like the truck one I did HERE.  For this card, I only used the lined/detailed stamp.

I colored in the poinsettias using my Polychromo pencils.
I love pink poinsettias so that was actually my driving factor
to color on red paper.
I die cut the Merry Christmas using a GinaMarie die.  I thought it needed something so I covered it in Versamark ink and then heat embossed
it using clear embossing powder.  It made it stand out a bit more. 
I then mounted the red panel on gold foil paper to pick up the gold
embossing.  I am slowly making a dent in my Christmas
cards but still have a way to go.

Sorry this post is late, it was just one of those times where
I couldn't get it together in time.  I had the card all finished
but had to sit down and type up this blog post.
Thanks for stopping by and remember to head over to
and anything goes challenge so come on over and let's see what you got.

November 3, 2017

An Old Classic

Hi, I am pretty excited to share this card with you.
Recently I ran across a stamp company called
Kitchen Sink Stamps.  I had never heard of them but while
doing a blog hop back in September for My Sweet Petunia (MISTI)
they were featured and I was hooked.

I used the Old Classic Truck set and following the sketch
at Sweet Sketch Wednesday I created this card.

Here is the sketch I followed.


The truck stamp is a multi-step stamping, in fact, this particular image
has 7 steps to it.  It adds so much dimension.  The biggest problem is picking
out your shades of ink. 

I had just ordered a couple sets at the time but I will definitely keep
this site bookmarked to check out some of the other sets they have.
The Kitchen Sink Stamps has a blog also so check it out HERE.

Thanks for stopping by, I hope you enjoyed my card. 

October 31, 2017

A Couple of Christmas Cards

Hi, I have two Christmas cards to share with you.
Well, they are pretty much both the same just in different colors.

I created the card following the sketch this week over at
RRCB 74

I was looking at the sketch trying to figure out what I was going to do, I actually set up a cut file in Cricut Design space.  Then I was looking through my Christmas stamps when I ran across this Unity Stamps Christmas tree
stamp from last year, so I thought well I will just flip this sketch on its side.
I rarely do this, normally I follow the sketch to a "T" but I thought
this was the perfect stamp. 
So here is what I came up with.
Red version, trees are stamped using the trees that were in
the Joyous Season set from October of 2016.  This one was stamped
using Catherine Pooler ink "Rockin Red" and heat embossed with clear.
The Merry Christmas is from a Hero Arts set from 2014, that I heat embossed with gold.

And the green version, I stamped using Distress Ink "Mowed Lawn" and
heat embossed with clear.  The Merry Christmas on this one I cut from gold
foil paper using a Gina Marie die.

The background paper on both cards is from a paper stack
from K&Company named Yuletide.  I have had this paper for several years.

This card was easy to create and I can see mass producing these to get
ahead on my Christmas cards for this year. 

Challenges entered:
A Snowflakes Promise - anything goes - ends - 11/13
Creates and Makes - anything goes - ends 11/27
Lemon Shortbread - anything goes - ends 11/6


October 26, 2017

A PAR-fect Day

Hi, boy October and November are such busy birthday 
months for me.  

One of my son-in-laws loves to gold so using the sketch this
week at Paper Players I created this card.
When I saw this sketch I knew it would be perfect.

I was looking through my single sheets paper trying to figure out what I wanted to use and I ran across this argyle pattern paper, thought
it would be perfect for a golf themed card.
I cut all the parts with my Cricut Explore.  The circle I embossed with a 
dots embossing folder but flipped it so it looked like divets
in the ball.  I always worry about cutting text from 
paper when it is small letters, so this time I cut the
word out of vinyl and stuck them onto the pretty silvery gray paper.
As a matter of fact this SIL works at a printing place and he brought me that
paper.  It is so pretty in person.  He has brought me some
pretty unusual awesome papers.

Thanks for stopping by I hope you enjoy my card and am
inspired if you have a golfer in your family. 
Challenges entered:
Paper Players - sketch - ends 10/27
Little Miss Muffet - anything goes - ends 11/2


October 23, 2017

Birthday Party Hats

Today I have a card I made following the sketch over at
Viva La Verve sketch challenge.  
If you are a regular visitor of my blog you know that I
love following a sketch when I create cards, in fact, it is rare
that I do not follow a sketch. 


I thought this looked like a fun easy sketch, so here is what
I came up with.

I wanted to use some of my Verve Stamps, so from the 
Treasured Words set I used the little party hat and stamped it randomly
in various colors of Catherine Pooler Inks.   The happy birthday is
also a Verve stamp from the Cake & Candles set, although when I
bought it many years ago it was available as a single. 
I stamped the HB and then cut it out with a Spellbinder die
from a label set.  I added a cute party hat button to the side as
my embellishment and added a strip of lime green ribbon.

You have till November 4th to create a card of your own
following the sketch at Viva La Verve challenge so head on over
and have some fun. 

Challenges entered:
Dragonfly Dreams - Fully Loaded - ends - 10/30
Stamped Blessings - anything goes + a stamp - ends 10/29
Lil Patch of Crafty Things - anything goes - ends 11/3


October 22, 2017

Some Fun with Watercolor Pencils

My great-grandkids were here last weekend so we had some
fun using the Watercolor Pencils from MAPED.

                           When I was sent these pencils to review I knew 
                                           my great-granddaughter would love them.  
                         She loves to paint but we all know how messy that can 
                                      get with a 6-year-old, so I thought
these pencils would satisfy her love of painting.

I printed up some images on some mixed-media paper
and had them all ready for them.

Here she is all ready to dig in and color.  I didn't really tell her what
the pencils did just that I had a surprise for her.  

So I had her color in some of the pumpkin using one of the pencils.

After she had a bit colored I gave her a water brush and told her
to go over where she colored.   
I so wish I would have videoed her when she first so what
happened when she added the water, she was so amazed and excited.

Then, of course, she had to sharpen her pencils. 
She was pretty impressed that it caught the shavings and of course
she loved the pink & purple color.

And her is she with her finished artwork.

Now the lil guy had been watching his big sister all along so he
had to have his try at those amazing pencils. 
His favorite color is orange so he had to color his little 
monster picture orange.
"OK, Nana now I am ready for the water"

And just like big sister her had to try out that pencil sharpener.
Even with his little hand he could hold this sharpener. 

Aren't they just the cutest little artists.  All in all, it was a fun time for all
of us, they got to paint and Nana did not have to worry about water getting
spilled all over or paints getting tipped over. 
#mapedhelix 


October 19, 2017

Fall Wheelbarrow

Sure wish Fall would show up here is Arizona.
The temperatures around here are just awful for this time
of year, we are breaking records.  Next week is suppose to 
get up to 98 degrees, HELLO Mother Nature hasn't anybody
told you yet that is is suppose to be cooling down. 

So I had printed up this image from Power Poppy's 
Fall Haul digital stamp set and thought maybe coloring it would make
it feel like or at least remind me that it is Fall.

My daughter was born on Thanksgiving day so I thought this
might make a good birthday card for her.

I love how it came out, I have to admit I followed the very good instructions
for coloring this image from Julie Koerber from the Bloomin Brigade DT.
I had to adjust the colors a bit since I was coloring on kraft and Julie was
coloring on white.  This is my first time coloring on kraft with my
Copics, I liked it but there are some adjustments.
The sentiment is from the same Fall Haul digital stamp set
and I had printed it out side by side so I made this card the size
that will fit into a #10 business size envelope. 
I mounted it on a couple layers to bring out some of the colors and popped
the top layer for dimension.

Well that is it, thanks for stopping by.

Challenges entered:
Power Poppy - Hues to Use (Sept open-ended)
Crafting with Attitude - anything goes - ends 10/29
Creative Knockouts - Fall - ends 10/26
Moving Along with the Times - Autumn Fall - ends 10/25


October 16, 2017

Much to be Grateful For

Hi, it is that time of year when the temperatures start to 
fall (hopefully soon here is AZ) and we begin to look
at all that, we are thankful or grateful for.

So using some of the stamps from the Stamp of Approval
"Counting Blessing Collection" I put together this Fall card.
The SOA box came with all kinds of Fall goodies.  I stamped
the background on cream colored paper using Distress Oxides and
a combination of the leaf stamps that were of the stamp sets.
Then using the leaf dies that were in the box I cut out some leaves in
coordinating colors.  Even the tan stitched strip across the front of the
card came in the box.  I distressed the edges of a piece of
tan cardstock and then stamped it with the grateful stamp. 
I think all the colors worked together well and remind me of
the colors the leaves change to in the Fall.

Thank you for stopping to take a peek at my card.

Challenges entered 
Paper Nest Dolls - anything goes - ends 10/30
Scrapbook Stamp Society - anything goes optional Autumn - ends 10/22
Pammies Inky Pinkies - anything goes - ends 10/22
Crafting from the Heart - anything goes - ends 10/22


October 15, 2017

Snowman Christmas

Hi, it's time again for the next Bugaboo Crafty Challenge
over at the Crafting Circle.

This month I chose to work with this cute snowman from
Bugaboo images who is the sponsor of this challenge. 


I printed him out on kraft paper and then colored him with my Prisma Pencils.
I cut an oval from the red paper using the GinaMarie die inside/out oval
I embossed it with snowflake embossing  folder the place it over the 
snowman so it was like a window.
I cut the label using a Spellbinder die then stamped the Merry Christmas
with a Stampin Up stamp and ran some snowflake ribbon through the
holes on the ends of the die cut.

I was sent some pencils sharpeners from MAPED to test out, although
most and geared towards school I wanted to see how they worked with
Prismas because they can be difficult to sharpen.  I am happy to report
the one I used with the eraser attached worked great with the pencils.
Be sure can check out all the cool products they have HERE.
My 6 year-old granddaughter was sitting here on my desk,
yes I said ON my desk (her favorite place to be) when I clicked over to
the MAPED website to get the link and oh boy she went wild
when she saw all the stuff.  She saw these pens
Image result for Color'Peps Jungle Fine Tip Marker
and said "Oh Nana can we order these on-line" I had to
laugh at such a different world now these kids live in.
You can order it HERE

So head on over to the CraftingCircle and color up some Bugaboo
images and join in the fun.  You will have till November 14th to join in.
And remember Bugaboo has a Friday Freebie every week. 


October 12, 2017

Water-coloring with Pencils

Hi, I am back to share another card with you today, another
Christmas card.  Trying to get some stash saved up.

I was sent some products to review from a company called
MAPED that has a lot of crafts and school products.

I have a 6-year-old great-granddaughter that loves to
draw, color and most of all paint.  Well we all know that
painting with a 6-year-old can be pretty messy, so I thought
using watercolor pencils with give her the feeling of painting but without
all the mess.
They are called Aqua Color'Peps 

I thought I would try them out coloring a stamped image before
I had a chance to color/paint with her, so here is what I made.

It was pretty easy to do, just colored in a bit and then used a water brush to                                                                spread the color.  
I did use some glitter pens to add some accents to it.  I matted the
pieces of paper with gold paper.  I stamped on a small tag using
a Hero Arts stamp then tied it on with some twine that has gold thread in it.

Back to those pencils, one thing I really liked about them is they have
slightly flat sides which means they will not roll off your workspace. 
The flat is not so much that you have problems sharpening them.  I also
got some pencils sharpeners to review.  I really loved the one
I got that has an eraser on one side of it, so convenient and the
eraser works great. 

I received a variety of pencil sharpeners and am anxious to try them
out with my PrismaColor pencils, we all know they can be
difficult to sharpen.
#maped


October 11, 2017

Hot & Spicy - Color Challenge

What a fun challenge this is.  Over at Less is More color challenge
this time the colors are "hot & spicy".  As soon as I saw this I knew exactly what
stamp I wanted to use. 
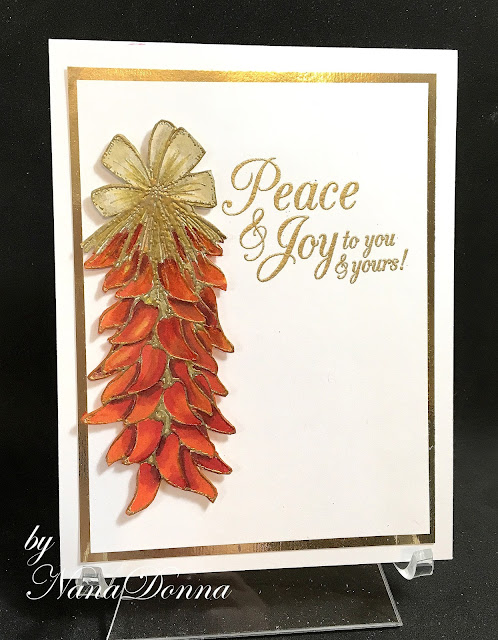
We recently took a trip over to Hatch New Mexico to pick up some chile
peppers (they are the best from there), once you see those strings of
red chile you know that Fall is here.

First off this challenge is all about simple or less is more as the
name states so I kept these cards as simple as possible. 

The string of chiles is a stamp from Mark's Finest Stamps, I bought this several years ago with the intention to use it on a Christmas card.  Living in Arizona I thought it worked well.
I colored the chiles with my Zig Clean Color brush markers, I tried
to leave some yellow showing but got a little too heavy handed with the red but it still looks good.  The Merry Christmas is a Hero Arts stamp
that I stamped in black and then heat embossed clear.


The second one I wanted to try and add a little more sparkle or elegance
to it, so I stamped it and heat embossed it in gold. I colored this
one using several Copic markers.
I fussy cut out the peppers but am going to work on trying to
scan in the image and cut it out with my Cricut Explore or Silhouette Cameo.
I would like to mass produce these so it would be very helpful if I can
get that figured out.

So what do you think, is that Hot & Spicy enough for you.
Leave me a comment and let me know which you like better.

I am so sad to say that when I went to link up Mark's Finest Stamps I
discovered that they have closed, such a shame but glad I
have the stamps I do have.

Challenges entered:
Less is More - hot & spicy colors - ends 10/13
Aurora Winds - clean & simple - ends 10/14
Color Inspiration - hand-colored image - ends 10/31
Scrapbook Stamp Society - anything goes optional Autumn - ends 10/22


October 3, 2017

Variety of cards using inks & Water

Hi, I been busy playing around with my inks and
various mediums and water to see what I could come up with.
I will share several cards here instead of doing a bunch of 
different posts.

Over at StampNation they are having a challenge that is
"just add water" well that was perfect for me to  play with
inks and water.

This first card I used Catherine Pooler inks in the colors
Mint to Be and Pixie Dust for the background.
I sponged the colors on a piece of watercolor paper but
was not too happy with it so I thought what the heck and I 
told my water bottle and sprayed it and wow I loved the
effect that made.  This card was actually made following
a sketch over at the Unity Show & Tell Facebook page.
I stamped the flower from Unity Stamps and then I took my waterbrush and added a little more color to the flower. 

The next card is using another Unity Stamp.  
I tried the loose or messing coloring then sprayed it with water and let the water move the color around.  I was not really happy with it till I cut it out with a GinaMarie die and then mounted it on a coral colored paper.

OK, and up next is another watercolor background plus
using a stencil to pick some of the color back up using water.  I
stamped the peacock, from the Naturally Inspired using various Catherine Pooler inks and mounted it on a die count out also from the Naturally Inspired collection. 

And last but not least I attempted the no-line watercoloring technique.
I love this rose stamp from Stampin Up and thought it was simple enough to try 
the no-line technique.  In the end I outlined the rose with a 
color glitter pen and it looks real pretty in person.


Well that is it for today, I sure hope you enjoy all my card, 
let me know what you think and which is your favorite one.

Challenges entered:
Crafty Sentiments - anything goes - ends 10/9
Creates & Makes - anything goes - ends 10/30
Digi Choosday - anything goes - ends 10/17


September 30, 2017

Oh What a Challenge!

Oh, boy what a challenge our fearless leader from the 
Crafting Circle put on us this month. 
You know you see all these white on white card (which I
really love) but I struggle with sometimes.
Well so being the person our leader MsWipz is she
has placed a challenge on us to use
BLACK on BLACK!!!!  Or she gave us some lea way
to do any tone on tone color if you got too freaked
out from black on black, LOL.
Me being me I had to follow the first challenge that she placed
on us, black on black.
Here is what I came up with.


Can we say, WOW!
I was so pleased, thrilled, overjoyed and shock at how well this turned out.
I Just made a black card base and then randomly stamped an image
from the Beautiful World stamp of approval collection, after I was
done stamping I heat embossed it with clear embossing powder.
In order to carry out the black theme, I stamped my sentiment in white on
a stitched die from Gina Marie. 

I got so excited on how this one came out I thought I would try it
with another color.

For this one I stamped on royal blue with a background stamp
from The Ton, this stamp is called Peony Garden.
You have to go and check out their stamps, they have some amazing
background stamps and they are a full 6 x 6 so it will cover your entire card.
I stamped my sentiment this time on a piece of pearl vellum.

Well this is really a fun challenge so head on over to the 

September 26, 2017

Ink Smooching

Hi, I have a quick card to share with you today.
Over at Stamp Nation, they are having a challenge,
"Just add Water" so it is any project that you have
used water to make.

                  I love working with watercolor and inks and all the good stuff.
  So here is what I came up with. 

Luckily I do not need a sympathy card right now, but I like
to have some on hand.
For this card, I use Distress Oxides in Wilted Violet, Faded Jeans, and Broken China.  I just smooched some ink on a piece of acetate
and then sprayed it with water, then smooched it onto
a piece of watercolor paper.   I like using the acetate because
you can see what is going on with your colors and then
press or move to get the look you like.
I then mounted in on cardstock to piece up a couple of the
colors.  I used my MISTI to stamp using a couple
Unity Stamps.  The watercolor paper is very rough so by
using the MISTI I was able to stamp it a few times.  I used 
Catherine Pooler Black Jack ink which is a dark gray.

Thanks for stopping to take a peek, hope you are
having a fabulous day.

Challenges entered
Crafty Sentiments Design - anything goes - ends 10/2
Digi ChoosDay - anything goes - ends 10/10
Lemon Shortbread - anything goes - ends 10/17
Through the Craftroom Door - anything goes - ends 10/2

September 20, 2017

Happy Holidays

Hi, if you have visited my blog some lately you will
know I love coloring on kraft paper.
So this week when I saw that PowerPoppy's challenge was to use kraft paper
I was all in.  What better combination is there besides
kraft paper and PowerPopoy images, it is a win-win.

So here is what I came up with using PowerPoppy's 
Hollyberries digital image. 

I colored it using my Polychromo pencils and Copics for the berries.
I was surprised to find that Copics color well on kraft paper.

I mounted the image on a piece of deep red and then popped
the whole panel onto my kraft card base and that was it.  A pretty
quick Christmas card.

Thanks so much for stopping by and head on over to PowerPoppy and
join in the fun or at least poke around at all the great images at
PowerPoppy HERE.

Challenges entered:
A Snowflakes Promise - anything goes - ends 10/8
Creates and Makes - anything goes - ends 9/25
Digi ChoosDay - anything goes - ends 10/4
Lemon Shortbread - anything goes - ends 10/4


September 15, 2017

A Start on my Christmas Cards

Well it is that time of year to start trying to figure out what
I will do for my Christmas cards.  I usually try and pick one
style and then make that is bulk (I send out about 40 cards) and
then always have some odds and ends that I have made.

So when it was time to do my Bugaboo image for this month's
challenge at the Bugaboo Crafty Challenge I decided to go
with a Christmas image, Winter Circle 
In fact, I made 2 cards using this image.

For this one, I went with more traditional Christmas colors.


The second one using the same image I went with Wintery colors.

I really like this image and it is fairly easy and quick to color.
On both cards I used a scallop die to cut the matting, I wanted it to be
a little bigger mat than usual. 
And that's it, fast cards.  This might just turn out to be my
mass produced card.

Thanks for stopping by and be sure and check out the 
The challenge runs from the 15th of the month till the 14th of the next month. 

September 11, 2017

Just for You

I am sharing a card with you I made a couple months ago
but never posted it. 

I was a fun simple card to make and I even made it
without following a sketch ha ha ha.


I used stamps that came in the Stamp of Approval box that was leased in June.
The collection was called Naturally Inspired and I love the stamps that same in there.
The cross hatch stamp made a fun simple background.  The feathers I stamped
in 3 different colors using Catherine Pooler Inks and then fussy cut them out.
I used a Fiskars punch to cut along the right edge of the card then wrapped some
bakers twine around it and popped the top layer.

This card was simple and fun to make, maybe I will try and do it in
a Christmas theme.  Will keep you posted.

Thanks for stopping to take a peek, have a great day.

Challenges entered:  
Crafty Freinds Challenge - dies cuts/punches - ends 9/22
DisDigiDesigns - Ribbon, Lace Twine - ends 9/22


September 1, 2017

Go OWL Out

Hi, time for the new Crafty Awesomeness Challenge over at
This month our sponsor is Rick St Dennis whose images are
a bit different than most out there.

This month I chose these owls because I knew I had the
perfect sentiment stamps to go with it.


LOL, funny huh?  I colored the lil owls using my Copic markers then cut
them out with a Gina Marie cross stitched die.  The sentiement is from
a stamp set I bought many years ago that is Pink by Design stamps.
The web site still comes up but don't think they do business anymore since
nothing has been posted since 2013.  Such a shame because there were so
many pun stamps.
Don't these two owls already look like the went "owl out".
I actually made this following a sketch from Sweet Sketch Wednesday but didn't get to enter it since the challenge ended on the 29th. I made the triangle piece using
my Cricut Explore and Design Space.
The ribbon banner I cut using another Gina Marie die and then stamped the
sentiment on it.  The corner is a die from

So come on over and join in the 

August 31, 2017

Kraft and White Challenge

Hi, the card I have to share with you today is for the color
challenge over at CAS-ual Fridays.

The challenge is to use 


What a great combination, lately I have really enjoyed working
with kraft cardstock.  You can get some really neat effects coloring on it,
but for this one there is no coloring.

A very simple card but I think has a big impact.
I embossed the background with a Cuttlebug folder, then the kraft panel I cut out using a Gina Marie cross stitched die.  I stamped the flower using a Unity stamp and heat embossed it in white.  The sentiment is from the last Stamp of Approval box that was also heat embossed in white.  I added a few sequins to give it 
just a touch of sparkle.
Well that is it, head on over to CAS-ual Fridays and join in the fun
and see what you can come up with.

Challenges entered:
CAS-ual Fridays - kraft & white - ends 9/5
Scrapbook Stamp Society - anything goes - ends 9/10
Pammies Inky Pinkie - anything goes - ends 9/3

August 30, 2017

A Desert Scene

Hi, I am so excited to share this card with you.  I am thrilled
with how it turned out, more on that a bit later (I can't take credit for it).

This week over at StampTV the challenge is to make a card
with a scene on it.  As soon as I read that I knew whose blog I would
go to for help.  

So here is my card.


I could never have done this with out following Theresa Momber's 
great tutorials at Crafting the Web.
Here is the one I followed to create this card 
Desert Sun Card using the Old West 2 GinaK stamp set, in fact
Theresa Momber is the illustrator of this set as she is with many of
GinaK's stamps.  I know, I know I followed her design to a T but I had to do it like that the first time, till I get a bit more comfortable to change things up
on my own.  Normally that is how I learn and do new techniques, follow it the first time as close as I can and then branch out with my own twist later.  I 
actually do the exact same thing when I make a new recipe, follow it the
first time then change it up later. 
I do not have any GinaK inks so I used my Distress Inks.  After I completed my scene I embossed lines on the card base using my Martha Stewart score
board, then mounted the panel. 
Please go over and visit Theresa's blog and check out her tutorials,
you won't be disappointed. 

I had so much fun creating this card I think I will go do another one.
Thanks for stopping by.

August 16, 2017

Sunflowers in a Jar

Hi, this card was made following the sketch this week at
Tuesday Morning Sketches, I love to play along here when I can.

Here is the sketch.

I flipped it sideways so I could fit my sunflower image that came
in this months Unity Kit of the Month.

I stamped the image onto kraft card stock and colored it using my
Polychromo pencils.  The sentiment is an Altenew stamp.
I loved the place paper and thought it would pull all my colors together,
it is from a DCWV stack a few years back called Autumn Amber.

Thanks for stopping to take a peek at my blog.
Challenges entered:
Tuesday Morning Sketches - sketch - ends 8/20
Power Poppy - hues to use - no ending
Through the Craftroom Door - anything goes - ends 8/22
Tuesday Throwdown - anything goes - ends 8/22