Pages

Showing posts with label Christmas. Show all posts

July 6, 2018

Christmas Snowflake

I thought I better get a little head start on my Christmas cards.
Every year I usually send out about 40 cards and most
of them are the same and then some random ones I made
during the year.
I am really thinking this might be my mass produced one.

I followed the sketch (of course) this week at 


Here is my card.
It was so hard to get a good picture of this.  The
snowflake is very sparkly and the Merry Christmas is
heat embossed in silver.

Thanks for taking the time to stop by, have
a great weekend

December 7, 2017

Silver & Gold Christmas

Gosh, has it really been that long since I posted last? 😏
Well Thanksgiving time kept me pretty busy, then
I had a surprise visit from my son and his fiance, it was a 
fabulous surprise and it was so nice to see them.  
Once I got back to crafting after all that it took me a bit to get rolling again.

I was able to get this Christmas card done using Unity stamps
and "no red or green" for their current challenge on Facebook.

Every year I usually make a Christmas card without the traditional
Christmas colors, but for some reason, this one stumped me
until I ran across this beautiful papers that my son-in-law 
had given me.  He works in a print shop and everyone while in a while
he will bring me some fabulous papers.  The silver paper on this
card has a metallic pearl-like finish to it and the gold is very
sparkly.   I stamped the tree and the saying using Versamark
ink pad and then embossed with a golden champagne-like color.
Both of the stamps are from the September Kit of the Month
from Unity stamps. Now parts of the merry didn't stamp out
all the way or very clear but that is the way the stamp
was made, it kind of messes with my OCD on everything
be stamped perfectly.
I embossed the silver panel and then added a  strip in
ribbon/chain along the side of the card.

Thank you for stopping by, I am so behind on my Christmas cards
I really need to get going. 

November 5, 2017

Coloring on Red

                    You know all the rage right now is coloring on kraft cardstock me
included love it.  I love the look, I love the way the color lays down, 
I just love everything about it. 
So I recently ran across where someone colored on colored paper,
I believe what I saw was blue.

Well I recently got my Perfect Poinsettia set of stamps from
Gina K so I thought it would be perfect to give it a try
to color on red.  So for my project this month over
at the Crafty Awesomeness Challenge I made this card.


I stamped the poinsettias and heat embossed them in gold.  This set
of stamps is actually a multi-step set of stamps, much like the truck one I did HERE.  For this card, I only used the lined/detailed stamp.

I colored in the poinsettias using my Polychromo pencils.
I love pink poinsettias so that was actually my driving factor
to color on red paper.
I die cut the Merry Christmas using a GinaMarie die.  I thought it needed something so I covered it in Versamark ink and then heat embossed
it using clear embossing powder.  It made it stand out a bit more. 
I then mounted the red panel on gold foil paper to pick up the gold
embossing.  I am slowly making a dent in my Christmas
cards but still have a way to go.

Sorry this post is late, it was just one of those times where
I couldn't get it together in time.  I had the card all finished
but had to sit down and type up this blog post.
Thanks for stopping by and remember to head over to
and anything goes challenge so come on over and let's see what you got.

October 31, 2017

A Couple of Christmas Cards

Hi, I have two Christmas cards to share with you.
Well, they are pretty much both the same just in different colors.

I created the card following the sketch this week over at
RRCB 74

I was looking at the sketch trying to figure out what I was going to do, I actually set up a cut file in Cricut Design space.  Then I was looking through my Christmas stamps when I ran across this Unity Stamps Christmas tree
stamp from last year, so I thought well I will just flip this sketch on its side.
I rarely do this, normally I follow the sketch to a "T" but I thought
this was the perfect stamp. 
So here is what I came up with.
Red version, trees are stamped using the trees that were in
the Joyous Season set from October of 2016.  This one was stamped
using Catherine Pooler ink "Rockin Red" and heat embossed with clear.
The Merry Christmas is from a Hero Arts set from 2014, that I heat embossed with gold.

And the green version, I stamped using Distress Ink "Mowed Lawn" and
heat embossed with clear.  The Merry Christmas on this one I cut from gold
foil paper using a Gina Marie die.

The background paper on both cards is from a paper stack
from K&Company named Yuletide.  I have had this paper for several years.

This card was easy to create and I can see mass producing these to get
ahead on my Christmas cards for this year. 

Challenges entered:
A Snowflakes Promise - anything goes - ends - 11/13
Creates and Makes - anything goes - ends 11/27
Lemon Shortbread - anything goes - ends 11/6


October 15, 2017

Snowman Christmas

Hi, it's time again for the next Bugaboo Crafty Challenge
over at the Crafting Circle.

This month I chose to work with this cute snowman from
Bugaboo images who is the sponsor of this challenge. 


I printed him out on kraft paper and then colored him with my Prisma Pencils.
I cut an oval from the red paper using the GinaMarie die inside/out oval
I embossed it with snowflake embossing  folder the place it over the 
snowman so it was like a window.
I cut the label using a Spellbinder die then stamped the Merry Christmas
with a Stampin Up stamp and ran some snowflake ribbon through the
holes on the ends of the die cut.

I was sent some pencils sharpeners from MAPED to test out, although
most and geared towards school I wanted to see how they worked with
Prismas because they can be difficult to sharpen.  I am happy to report
the one I used with the eraser attached worked great with the pencils.
Be sure can check out all the cool products they have HERE.
My 6 year-old granddaughter was sitting here on my desk,
yes I said ON my desk (her favorite place to be) when I clicked over to
the MAPED website to get the link and oh boy she went wild
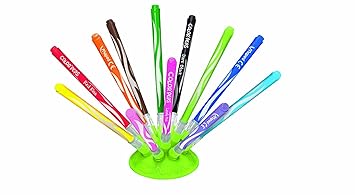
when she saw all the stuff.  She saw these pens
Image result for Color'Peps Jungle Fine Tip Marker
and said "Oh Nana can we order these on-line" I had to
laugh at such a different world now these kids live in.
You can order it HERE

So head on over to the CraftingCircle and color up some Bugaboo
images and join in the fun.  You will have till November 14th to join in.
And remember Bugaboo has a Friday Freebie every week. 


October 12, 2017

Water-coloring with Pencils

Hi, I am back to share another card with you today, another
Christmas card.  Trying to get some stash saved up.

I was sent some products to review from a company called
MAPED that has a lot of crafts and school products.

I have a 6-year-old great-granddaughter that loves to
draw, color and most of all paint.  Well we all know that
painting with a 6-year-old can be pretty messy, so I thought
using watercolor pencils with give her the feeling of painting but without
all the mess.
They are called Aqua Color'Peps 

I thought I would try them out coloring a stamped image before
I had a chance to color/paint with her, so here is what I made.

It was pretty easy to do, just colored in a bit and then used a water brush to                                                                spread the color.  
I did use some glitter pens to add some accents to it.  I matted the
pieces of paper with gold paper.  I stamped on a small tag using
a Hero Arts stamp then tied it on with some twine that has gold thread in it.

Back to those pencils, one thing I really liked about them is they have
slightly flat sides which means they will not roll off your workspace. 
The flat is not so much that you have problems sharpening them.  I also
got some pencils sharpeners to review.  I really loved the one
I got that has an eraser on one side of it, so convenient and the
eraser works great. 

I received a variety of pencil sharpeners and am anxious to try them
out with my PrismaColor pencils, we all know they can be
difficult to sharpen.
#maped


October 11, 2017

Hot & Spicy - Color Challenge

What a fun challenge this is.  Over at Less is More color challenge
this time the colors are "hot & spicy".  As soon as I saw this I knew exactly what
stamp I wanted to use. 
We recently took a trip over to Hatch New Mexico to pick up some chile
peppers (they are the best from there), once you see those strings of
red chile you know that Fall is here.

First off this challenge is all about simple or less is more as the
name states so I kept these cards as simple as possible. 

The string of chiles is a stamp from Mark's Finest Stamps, I bought this several years ago with the intention to use it on a Christmas card.  Living in Arizona I thought it worked well.
I colored the chiles with my Zig Clean Color brush markers, I tried
to leave some yellow showing but got a little too heavy handed with the red but it still looks good.  The Merry Christmas is a Hero Arts stamp
that I stamped in black and then heat embossed clear.


The second one I wanted to try and add a little more sparkle or elegance
to it, so I stamped it and heat embossed it in gold. I colored this
one using several Copic markers.
I fussy cut out the peppers but am going to work on trying to
scan in the image and cut it out with my Cricut Explore or Silhouette Cameo.
I would like to mass produce these so it would be very helpful if I can
get that figured out.

So what do you think, is that Hot & Spicy enough for you.
Leave me a comment and let me know which you like better.

I am so sad to say that when I went to link up Mark's Finest Stamps I
discovered that they have closed, such a shame but glad I
have the stamps I do have.

Challenges entered:
Less is More - hot & spicy colors - ends 10/13
Aurora Winds - clean & simple - ends 10/14
Color Inspiration - hand-colored image - ends 10/31
Scrapbook Stamp Society - anything goes optional Autumn - ends 10/22


September 20, 2017

Happy Holidays

Hi, if you have visited my blog some lately you will
know I love coloring on kraft paper.
So this week when I saw that PowerPoppy's challenge was to use kraft paper
I was all in.  What better combination is there besides
kraft paper and PowerPopoy images, it is a win-win.

So here is what I came up with using PowerPoppy's 
Hollyberries digital image. 

I colored it using my Polychromo pencils and Copics for the berries.
I was surprised to find that Copics color well on kraft paper.

I mounted the image on a piece of deep red and then popped
the whole panel onto my kraft card base and that was it.  A pretty
quick Christmas card.

Thanks so much for stopping by and head on over to PowerPoppy and
join in the fun or at least poke around at all the great images at
PowerPoppy HERE.

Challenges entered:
A Snowflakes Promise - anything goes - ends 10/8
Creates and Makes - anything goes - ends 9/25
Digi ChoosDay - anything goes - ends 10/4
Lemon Shortbread - anything goes - ends 10/4


September 15, 2017

A Start on my Christmas Cards

Well it is that time of year to start trying to figure out what
I will do for my Christmas cards.  I usually try and pick one
style and then make that is bulk (I send out about 40 cards) and
then always have some odds and ends that I have made.

So when it was time to do my Bugaboo image for this month's
challenge at the Bugaboo Crafty Challenge I decided to go
with a Christmas image, Winter Circle 
In fact, I made 2 cards using this image.

For this one, I went with more traditional Christmas colors.


The second one using the same image I went with Wintery colors.

I really like this image and it is fairly easy and quick to color.
On both cards I used a scallop die to cut the matting, I wanted it to be
a little bigger mat than usual. 
And that's it, fast cards.  This might just turn out to be my
mass produced card.

Thanks for stopping by and be sure and check out the 
The challenge runs from the 15th of the month till the 14th of the next month. 

December 2, 2016

Christmas JOY

Ok, I am really running against the clock on this one.
I made this card following the sketch over at 
Retro Rubber Challenge where you have to use an older
rubber stamp.  The Joy stamp is from a 2000 Stampin Up
set.

I stamped it with VersaMark ink and then heat embossed with
Brutus/Monroe Alabaster embossing powder.
I LOVE this embossing powder, some of the best I have used.  It covers
very well and heats/melts quickly and evenly.
I flipped the sketch on it's side and using some glitter paper
 added some strips.  The background paper is from a
Christmas paper stack from Michaels a couple years ago.

Well, that is it, thanks for stopping by.

Challenges entered:
Retro Rubber Challenge - sketch/use rubber stamp  ends 12/2
Time Out Challenge - Anything goes Christmas  glitter/sparkle ends 12/6
Moving Along with the times -  Anything goes Christmas ends 12/6
Crafting with Attitude - Anything goes ends 12/24
CCEE Stampers - Color Red

October 28, 2016

A Couple Christmas Cards

Hi, just a quick post to show you a couple Christmas cards
I have made recently.  
I usually make one that a mass produce for the majority of my
cards, but I also make random ones over the year.
And then this one is the same pattern.
This one I used some stamps from SugarPea Designs.
Both of these cards I set up a cut file in Cricut Design Space and cut using my Explore.  I did this cause I thought it would waste less paper plus make it easier to duplicate the cards with different papers if I choose to.
I really like this one this one came out.  I also set up a cut file for this one in Design Space.  The Merry Christmas is a Gina Marie die and
the reindeer was cut using my Explore.   I embossed the back panel using a Cuttlebug embossing folder, Christmas Houses. 
Thanks for taking the time to stop and take a peek at my Christmas cards.

October 3, 2013

A Few Christmas cards

Hello everyone, sorry it has been a while since I posted.
Today I have a few Christmas cards that I have made over the last few weeks to share.  Trying to get a little head start on them.
The first one is a very simple card, using paper from Recollections all season paper pad.  The holly was cut using my Cricut.

Here is a shaped card I made using Cricut Craft Room and the Artiste cartridge.  I printed the paper using my Imagine. I love the way it came out, very easy can be mass produced.
This one I totally scraplifted (can't remember from who. sorry)
It is all made using pearl white paper.  I cut the frame from the Artbooking cartridge, a couple of times and also from chipboard, so I could pop dot it.  I added a piece of acetate for the window, then punch a bunch of branches using the MS branch punch.  The bottom strip is also a MS punch that I wove some ribbon through.

This one I made using the papers from last years CTMH paper pack.  I love the papers in it ans sure wish I would have bought more of it.
The center ornament was cut using the Celebrate with Flourish cartridge.
The colors are so much prettier in person.
The last one I made using the papers from this years CTMH Christmas paper pack called Frosted.   They also have a complete card making kit with this paper and it has everything you need to make 15 or so cards including stamps, if you want to check it out click HERE.This is also a simple one that could be made easily with many different paper combinations.
Wwll thank for stopping by and hope you enjoy my Christmas cards
Hugs!

November 20, 2011

Snowflakes

This is a very simple card, that I let the paper do most of the work.  The paper is from an older Christmas stack I had from a few years ago.
The 2 snowflakes are from a couple different Cricut cartridges, I covered them with very fine crystal glitter and pop dotted them.  The sentiment is a stamp that I stamped directly on the printed paper and heat embossed with white powder.
This was my first time using crumple or crinkle ribbon that I just got from an exchange on the Cricut message board.  I am not sure I know what I am doing with it yet.  Do you think it looks OK?  I will learn as time goes by.

Thanks so much for taking the time to visit my blog.  And I wish everyone a very wonderful Thanksgiving holiday with family & friends.

Challenges for this card
Christmas Inspirations  No images but must be Christmas  ends  -  11/30
CES Challenges  Snowflakes   ends  -  11/25
Crafty Catz   Snowflakes   ends  -  11/24
Moving Along with Times   Let it Snow   ends  11/23

July 18, 2011

Christmas in July

I made my first Christmas card of the year.  It was made following a sketch on the Cricut message board, as are the majority of my cards are.  I hauled out my Christmas paper stacks and found these two papers in my My Minds Eye paper pack from last year and created this card.
The plaid paper in the background I cut using the MS Seasonal Cake Art cartridge with a file that I set up in the Cricut Craft Room.  They are improving the Cricut Craft Room all the time and it cuts like a breeze.  Soon I hope they will have most of the kinks worked out.
Other than that cut the rest in stickers so I feel like I cheated a bit but I do like how it turned out.  The stickers are some glittery ones I got from WalMart last year.
A close up of the tree, they are clear and just about disappear when you put them on paper.  I stuck this one on white pearl linen paper.
The "Joy" i stuck directly on the plaid paper that has some glitter in it.  The candy canes are also small stickers.
I am so glad you stopped by and I would love it if liked what you seen enough that you would become a follower.  I am coming up on my 1 year blog anniversary and would love to have 200 followers by then. Thanks

This card falls into the following challenges
Charisma Cardz Stars  -  ends 7/20
Creative Inspirations  Christmas in July  -  ends 7/27

November 1, 2010

Miracle of Christmas Card

This came out so wonderful, I just wish that the colors would have shown up better.  I made it following one of sketches this week at RAQs Challenge on the Circut message board, and boy lining up all those squares truly was a challenge.
The blue background star paper was from a Winter stack that I got at Wal-Mart a couple of years ago.  I don't know about your but the three Wal-Marts in my area really seem to be scaling down there scrapbooking area.  Well I cut the star paper into 1 1/2 inch squares.  I tired my best to get them straight and spaced the same, I did OK for the most part.  The center scalloped ovals were cut from A Child's Year cartridge and measure about 3 1/2 inches.  The papers are so pretty the center is actually a very very dark blue pearlescent metallic that I get from Paper and More and so it the lighter blue behind it.  They have fabulous papers, they are so pretty, try their sample packs they ship for just a $1 and super fast.  Well the imagine is the center is from an older Stampin Up Christmas set that I stamped and embossed with a pearl embossing powder.  The sentiment on the bottom is from that Stampin Up set.
I pop dotted each layer.  Someone on the message board said that with the paper I used it made it look like a night sky window looking outside.    And I also did the inside very simply.
Thanks for stopping by and would love it if you left a comment.  I love reading what everyone has to say.

October 20, 2010

Christmas Wreath Card

This card really gave me fits and I am still not sure if I like it.  I made it following one of the sketches at RAQs challenge last week and also for the Paper Cutz Challenge where the theme is anything goes. I thought I would make a Christmas card to get myself going since it will be here before you know it.
The background paper is from a Christmas stack that I bought at Wal-Mart last year that has a lot of blues in it.  I wanted to dress or bling it up so I sprayed it with sparklie Glimmer Mist although it looked OK it just not do it for me so I inked the edges with silver ink and still it did not have that pop or WOW I was looking for.  So I crumpled up the whole piece of paper into a little ball and then unfolded it and rubbed the silver ink on it so it rubbed onto the creases, it was OK but at that point I thought I better stop messing with it.  LOL  But I did add a few holographic dots to it here and there.
The wreath was made using the Martha Stewart branch punch.  I punched it a bunch of times out of very light blue and then I had read somewhere that if you punch out aluminum foil it will sharpen your punch so I threw a few of the foil branches in there.  I glued them onto a circle I cut with my Cricut, it was an open circle that I found on Plantin Schoolbook cartridge.  Of course them I had to go and spray it with Glimmer Mist Frost to added some sparkle, can you tell I like this stuff.  In fact I had ordered some from Scrapbooking Warehouse where they have it on sale for $4.75 a bottle which is a great price and my ordered arrive today with some neat colors.
Then my first try at printing sentiment in a circle using Microsoft Word, it came out pretty cool thanks to instructions from Carolyn D on the Cricut message board.  I printed on white pearl paper and as soon as it came out of the printer I sprinkled glittery embossing powder on it and heat embossed it. It worked!!! I was so excited................
You can see the foil branches here and there,  I also added some bling on the wreath.  So I hope you like it, I guess it is growing on me, thanks for any comments.

September 21, 2010

Christmas Card ---- Getting an early start

As we all know Christmas sneaks up on us every year.  Each year with good intentions we are always going to start our Christmas cards early so we are not rushing at the last minute.   I made this Christmas card for RAQs Challenge on the Cricut message board this week, I think it came out very pretty. 
Although I really like this card, it will not be my Christmas card this year.  I make all my cards the same each year (easier for me to keep track of :}) and I already have one sample almost made.  Will share that with you when I get it done and at least get into late October.
I so wish there was a way to take pictures of pearl like paper so it would show up better.  The white and the blue are some very very pretty paper I got from Paper and More, they have fabulous papers and their service is great.  You can get some sample packs fairly inexpensive and all samples ship for $1.00, check them out you won't be disappointed.   I Cuttlebugged the white circle with the "Winter House" folder and added some crystal Sitckles to the snow spots, Santa flying over is a small stamp that I heat embossed with silver.  The other white paper I embossed using the Sizzix snowflake embossing folder.  Snowflakewas from the Cricut cartridge called Christmas at 1 1/4 inches, twice from the pearl white and once out of glossy silver paper then I pop dotted them and added a blue pearl to the center.  The whole card measures 6 1/2 by 5 inches. 


Here is a close up of the snowflake, you can see the pearl paper a little better in this picture.  This is a pretty simple and quick card to put together and I hope I can get some of you inspired to at least start thinking about those Christmas cards.