Pages

Showing posts with label Cindy Loo. Show all posts

August 21, 2011

A Zebra Hello

Hi everyone I finally feel like I am getting close to being back on track.  For those of you that don't know, I have been feeling very lousy lately one of the things they think I have (and I think so also) is shingles, YUCK.  One of the things I think have helped a bit is the nerve medicine I take anyway and since shingles is a nerve problem I believe that medicine is helping.  They are starting to fade.  They are also doing other tests as I become tired very fast.
Well enough of that, I did finally get to make a card over the last 3 or so days, besides doctor appointments, other things to take care of and getting so tired I had to take a nap it is a big deal that I finally got a card done
This was made following a sketch on the Cricut message board and also a color challenge of using Black, Red, Gray and White.
The Zebra is ribbon, and the "hello" is a stamp.  I cut the white swirls from the Cindy Loo cartridge and sprayed it with Glimmer Mist to give it some sparkle.  There is a lot of sparkle on this card but does not show up well in the picture.  Also hard to see but the red half I embossed using my Martha Stewart score board in a diamond pattern.
You can see that pattern better in this picture, I added a few Sakrua gen pen sparkle dots to the white.  The hello I rounded the corners and distressed the edges.
The buckle I cut using Fabulous Finds.
I cut it 5 times and glued them all together.  Then I put Diamond Glaze on it rather thick.  After it dried using my i-Rock I added some bling.  I hope you enjoy my card.
Thanks for taking the time to leave me a comment. I love to read them, besides that way I knew you were here to take a peak.

Challenges for this card
Crazy 4 Challenges  Bingo (embossing, die cuts, ribbon)  - ends 8/26
Basic Grey  Anything goes  -  ends 9/2
Crafty Purple Frog  Anything goes Red hot  -  ends 8/30
Make It Monday  Always anything goes  -  ends 8/28

August 9, 2011

Joy Fold Card

Here is my third sketch/challenge for this weeks RAQs challenge that I am hosting.  The Joy Fold card is very easy and fun to make.  Here is a link for Splitcoast Stampers for a tutorial and measurements.   Splitcoast Stampers is a great resource for tutorials and inspiration.

 The mushroom is from the Cindy Loo cartridge, I put Glossy Accents on the green part to give it dimension.  The mushroom also acts as the part that hold the card shut.

The papers are all from the DCWV Green Stack.  Oops can't remember where the happy birthday is from.
The thing about Joy Fold cards is that is is hard to see them with just one picture so here are a few more shots.
And more more with it open, looking down from the top.
Now it is your turn, go ahead and give it a try, they are very easy.

Thanks for taking the time to leave me a comment. I love to read them, besides that way I knew you were here to take a peak.

Challenges
Craft Your Days Away  Birthday  end - 8/18

January 22, 2011

Flower Soft Trees...............

For a long time, for some reason I have wanted a stamp of bare trees, not really sure why just thought that some day it would be nice to make a card with, so I bought one a month or so ago.  Well that day came, when I got my March 2011 issue of CardMaker magazine on the front cover waw a card made with a bare tree and covered with Flower Soft.  Then at Jitterbuggin the challenge this week was to make a card with.   BROWN.....and one other accent color! It also had to include at least one Cricut cut and a bow somewhere.
 So here is the card I made following that theme.
 I think I may have done the color scheme a bit backwards, OOPS seems like it came out green with a "BROWN" accent, but I think that Sherri will let me include it in the Jitterbuggin Challenge :).

I cut the green frame for the Cindy Loo cartridge, this cartridge has some great frames on it and you can cut out the flourish to match.   I stamped my bare tree stamp using a dark brown and heat embossed it.  Then I put dabs of glue randomly on the tree branches then sprinkled it with light green Flower Soft  and pressing it down to push it onto the glue, after that I added a few more dabs of glue and sprinkled on Flower Soft Summer mix to make it look like blossoms on the tree. 

I hope I achieved the effect of blossoms on the trees, with a few that had fallen onto the ground.
We also had to have a bow, well I wanted to try and keep this as a card I can use for a guy so I chose a brown piece of braiding cord to make my bow.  Later I will add a sentiment when I decide how to use it.    I offset the frame at the top corner so I could add that sentiment in the lower right corner when I am ready.
Thanks for stopping by, I always enjoy hearing from you.

January 13, 2011

A Simple Birthday card.

I made this card to day for a weekly card challenge on the Cricut message board.  It also fits a color challenge which was, robin egg, rust and cream.  I had hoped to make this card to be a male birthday card, but I think with the lacey cut it makes it a bit feminine, oops!
The cream colored lacey cut is from Cindy Loo, and so is the label part where I stamped Happy Birthday.
The papers are glitter papers from a My Minds Eye fall stack.  Hard to see in the picture but there is a "robins egg" blue border.  The card is 4 x 8 so I had to make my own envelope.  I also used my i-rock to add jewels on the lacey part.
Thanks for stopping by and I would love to hear your comments,

December 11, 2010

ALLL THAT GLITTERS BLOG HOP!

It is finally here and I am so excited about this blog hop.  It is the first time I have participated in a blog hop so I am a bit anxious, but I am sure after it is over I will be hooked on hopping.  The theme of this blog hop is perfect for this time of year and besides who doesn't like a lot of glitter and bling, I know I do and I am sure you will see lots of it a long the way.  I feel very flattered  to be part of this extremely talented group of people and I can't wait to see what they have created PLUS besides all the inspiration there will be prizes at some of the blogs, maybe even all of them I don't know.  I am offering a small package of goodies so to qualify to win my package please leave comment on this post, becoming a follower is not a requirement but I would really be delighted if you did.
So on to my project I created.....................I made a card that has a lot of sparkle and also has a pull out ornament.
Photobucket
The white circle is a cut from Cindy Loo cartridge cut twice with the second one flipped.  I covered both birds with Martha Stewart Garnet glitter, after it dried I glittered the rest with Martha Stewart Fine Crystal glitter.  Very hard to see the sparkle but it is there.  I welded a ornament hanger from Christmas Noel cartridge so I could put ribbon through so it could be hung up.   Then using the shadow feature for the same cut on the Cindy Loo I cut it from clear acetate, so I could glue the glitter pieces back to back on the acetate. 

Gluing something like this on acetate is rather challenging as it slips and then you can see it, so I dabbed glue all over the acetate and it gave it the look of an ice crystal window effect.  Pretty good cover up for a mistake. LOL
The red background paper I stamped using Versamark Dazzle with a star stamp to just give it a watermark look, then when I glued the glued on the front I left a pocket for the ornament to slip into.


I even finished the inside, (this is unusual for me) using a frame from Stretch Your Imagination, then cut the bow frame out of the same gold as the front, also from Stretch Your Imagination. 

The card is 5 1/2 inch square card and the ornament is just under 5 inches.  Here is the card with the ornament taken out.

Thanks, and don't forget to leave a comment for a chance to win my small prize package.  I will pick a random winner on Tuesday,
Now here is you next stop.....


Cardz TV 


And in case you get lost along the way here is a list of the blogs.
A Place For My Cards
CardDreams by Nana Donna   You are here
Cardz TV
The Cricut Couple
The Cricut Diaries
Daily Grace Creations
Gaby Creates
Love, Laughter, and Creations
MelissaMade
She's A Sassy Lady 

Thanks Melissa and Bobby for coming up with this hop and inviting me to join.  And a big thanks to Melissa for all the "extra" help or my post would never had made it up!
Thanks for hopping along and have a sparkly, glittery Holiday season!

December 3, 2010

50th Anniversary Card

Tomorrow we are going to a 50th anniversary party for a school mate of my husband.  So here is the card I came up with.
 The card is 5 x 6 1/2, I covered the base card with holographic gold paper, then I stamped with a script background stamp on light golden vellum and heat it embossed it with gold.  The cake was cut from Paper Doll Dress up and is about 5 inches high.  The cake in cut out of white glitter paper, then I covered the "frosting" with gold Perfect Pearls and Diamond Glazed over the top to make it look more like it was thicker or raised.  The "50" is cut from the font on Cindy Loo out of the same holographic gold paper.  I bought some self adhesive Martha Stewart strips that I stuck on the cake as decoration, then finished off the swirls with a few red pearls.
It is very shinny and pretty in person, one of those that just does not photo too well.

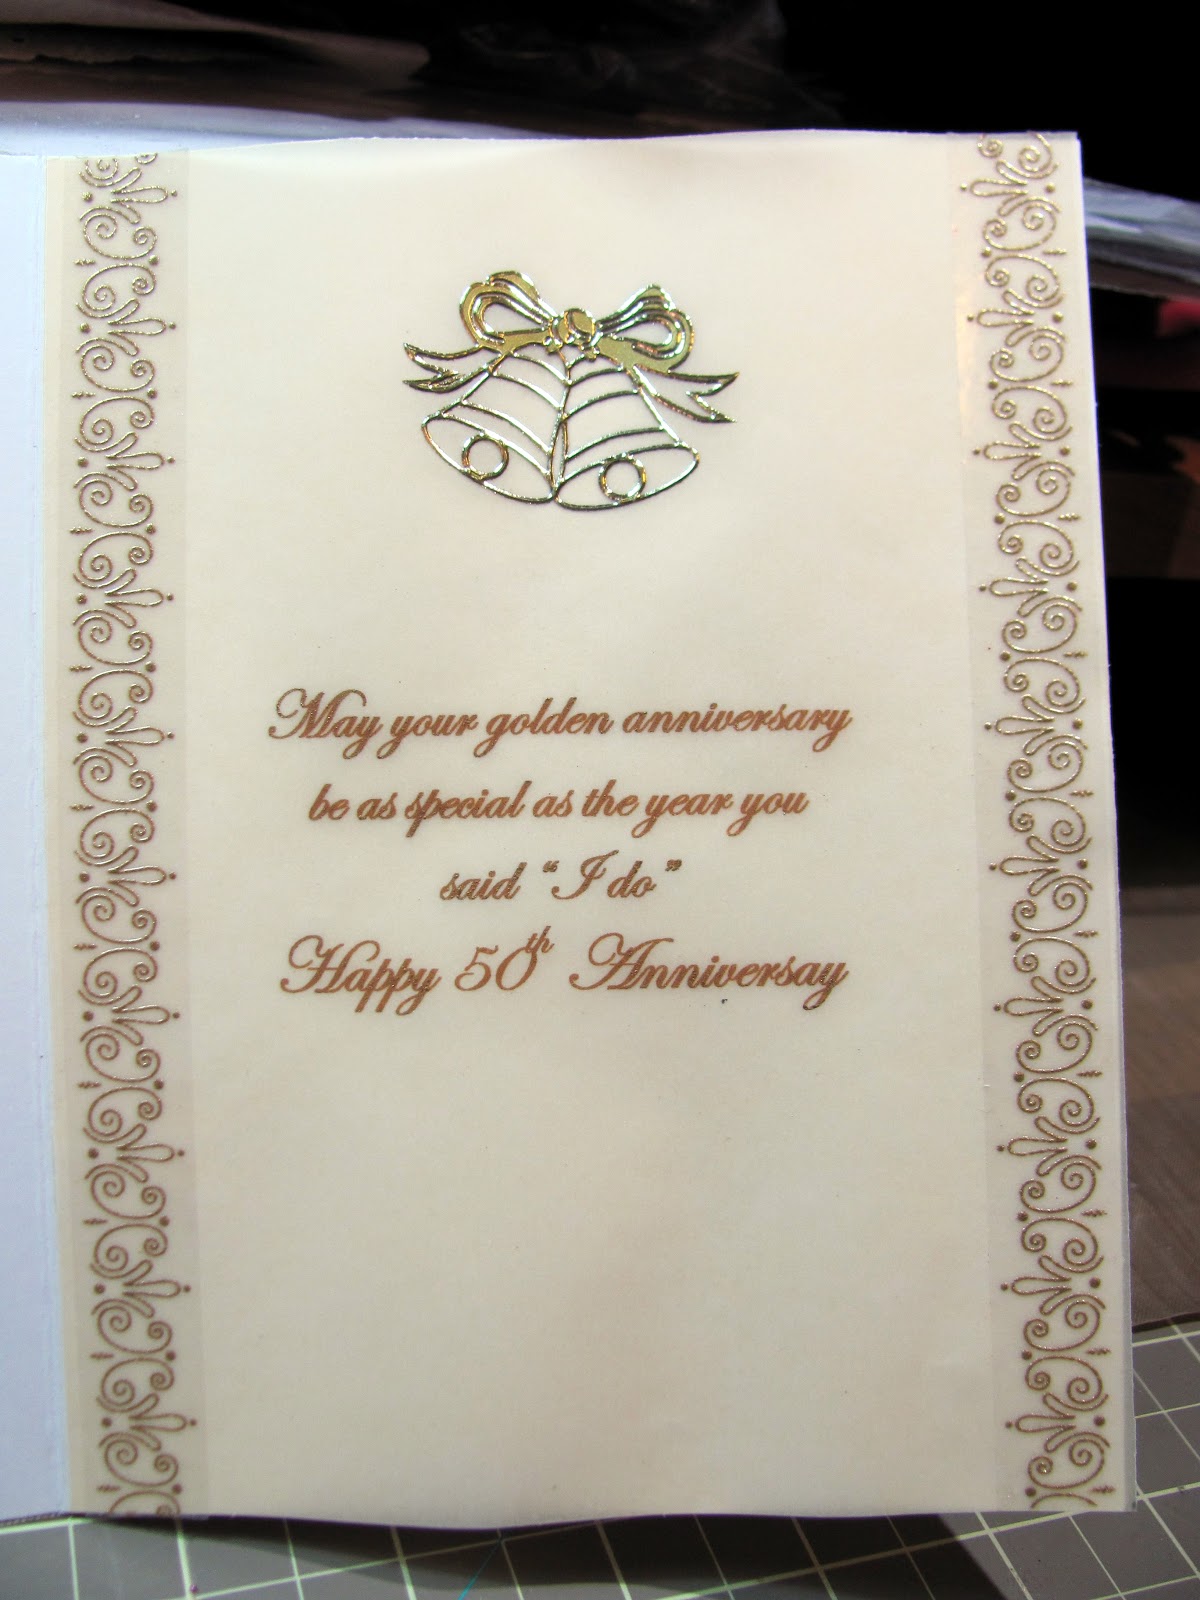
The inside I printed the verse on the same vellum, then added some of those Martha Stewart strips down the side.  The bells are a sticker.

Thanks for stopping by.

November 29, 2010

Hello Teapot card

After winning my set of 148 ProMarkers from Enfys at Going Buggy I finally got a project made using them.  And I have to tell you I love coloring with them, they blend incredibly well and the color spectrum is vast, click HERE to see a color chart. 

 The image is a digital image from Whimpsy Stamps  if you are looking for some great digital images check them out they have some fabulous designers, they also sell rubber/clear stamps if you prefer that.   I colored the Teapot using Yellow, Soft Lime, and Primrose starting with the darkest on the outside then Soft Lime and finally blending back into all the colors with Primrose, finally I went over the middle area with the blending pen to make sure it was all blend and to remove a slight bit of color.  I used the same method for the rose/flowers using Mango, Peach and Oatmeal for the blending.  Now I had this beautiful Teapot colored and was trying to figure out what kind of card I wanted to use it on then at My Sheri Crafts the challenge this week was to make a "Hello" card, it was the perfect fit for this teapot.  The hello is cut from Cindy Loo cartridge.
I mounted the cut out teapot on a piece of peach paper and them cut around to leave a border.  The card is 5 1/2 inch square, and the green background paper is from K&Company.  I pop dotted the teapot to mount it on the card.
Here is a close up of the flower

I had a very hard time getting a picture that showed the true colors.  I covered the flower with Diamond Glaze.  You can't see it but I printed the image on Cryogen White paper from Paper Temptress it is so pretty it has a slight sparkle to it that you can see through the coloring.  This paper is great for coloring with alcohol ink markers, they blend very smoothly and hold the color so it doesn't bleed outside your lines, very slight blending out the back of the paper, but that was probably me adding too much color.  Still learning how to use these markers but am very please with how this one came out. 
Thank you so much for stopping by and I would love to hear what you think of my first project with my ProMarkers.

November 2, 2010

Get Well Owl card - My Sheri's Crafts

 Hi, I made this card for 3 different challenges that I found I could tie into each other.  At My Sheri's Crafts you were to make a Get Well card to cheer some one up.  
The other two challenges are Jitterbuggin where you had to use an owl on your card and at least one circle and one square somewhere, then at Fantabulous Cricut you had to use some kind of bird.
This card is 5 x 7 so it is a bigger card, the circles are cut using George (of couse, my go to for shapes) then I Cuttlebugged them, the red one with Dots and the yellow one with Birds & Swirls.  I used one of my Martha Stewart punches for the red edge. 

The Owl is cut from Cindy Loo and pop dotted and added some gems with my i-Rock for his eyes.  This is the first time I used my Cindy Loo and it has some real cute images on it.  It is mounted on a piece of white vellum that I put on a brown square that I used a corner punch on.
The "get well" wish was stamped with a Sweet n Sassy stamp and heat embossed.  I stamped it on a label I cut from Storybook and then put brads on the ends.  The background paper is from DCWV Green Stack, but for some reason this card just does not "have it" to me, does it need more bling or do you have any ideas?  Let me know
Thanks for stopping by and I would love to hear what you think.