Pages

September 12, 2010

Digital Image - Girl with flowers

I got this free digital image by participating in a challenge this week at
Crafters Digital Art Center, here is a link CDAC. They have several challenges each week so please do check them out. This card also follows one of the sketches for RAQ's Challenge this week on the Cricut message board.
On to my card, it did give me fits as I kept changing what coloring medium I was going to use.   First I tried coloring it with my Copic markers and that was a disaster!  It was so bad that I won't even show you a picture.  I have a lot of learning to do with using Copics.  I knew I could do better with my Prisma Pencils and OMS so the image was colored that way.   I printed the image on Paper Temptress Cryogen White paper which is so pretty as it has a slight sparkle to it and works well with both Copic markers (my problem wasn't the paper is my coloring)and the Gamsol coloring techniques.  The challenge was to use embellishments on the image itself.  That also ran into a re-due for me :(, as you will see in the pictures.  I cut the image using the Nesties Scallop Ovals,  I would have used my Cricut but I am not to good at the center point cut and knew I could cut exactly where I wanted with the Nesties.

Here is my first try at it with the small flower embellishments on the flowers on the image.....


I think the flowers were a little too big and covered her face, besides you could not see the stems so it was hard to tell she was holding the bouquet.  So back to the drawing board, took those flower stickers off and colored the flowers with my Prismas and then put rhinestones in the center and also put a small rhinestone for the button on her shoe.  I think this looks much better, don't you?

The colors of the papers don't show up too well, this is so much prettier in person.  The back ground paper is a light time green with blue, purple and pink flowers on it, the paper is from a K & Company stack.   Here is a close up of the image
After all that in the end I think it came out pretty cute, let me know what you think.  I love comments, thanks.


September 11, 2010

Distressed Card

I made this tag shaped card by welding two tags from George together in Design Studio.  The scalloped circle is from Celebrations and stamped with a happy birthday circle stamp.  I CuttleBugged the chocolate Cored'nations paper with distressed stripes folder and sanded it to reveal the pink underside tore it and then torn a patterned paper and put it behind it to add to the distressed look.  The flower is from Doodlecharms cut 4 times and pot dotted.  A few skittles across the top and lacy ruffled ribbon through the hole. It is not very big and fits into an A2 size envelope.  Hope you like it, thanks any comments are appreciated.

I think this came out pretty................but simple

My sister-in-law let me look through her "Paper Crafts' magazines and there are some fabulous ideas in them.  I had never heard of this magazine but after looking through them I had to subscribe.  It comes out once every other month, if you don't already get it check out this link to subscribe.
This card was made following a sketch in the March/April 2010 issue.  I thought it was very simple and pretty.  And I actually made it very quick :).  If you know me then you know that hardly ever happens!

The paper is from a K & Company double sided stack.  The base is one side of the paper and the angled strips are the other side of the paper.   Sometimes double sided paper makes matching colors/patterns easy.  The trickiest part was cutting the strips on an angle. 
and I actually did the inside of this card.  I believe the inside frame was cut from the Wild Card cartridge.  I printed the sentiment on vellum paper and glued it inside.  This card is 5 1/2 x 4 1/4 first time I had made an A2 size card in a long time. 

September 10, 2010

A Fall Card without Brown, Orange or Yellow

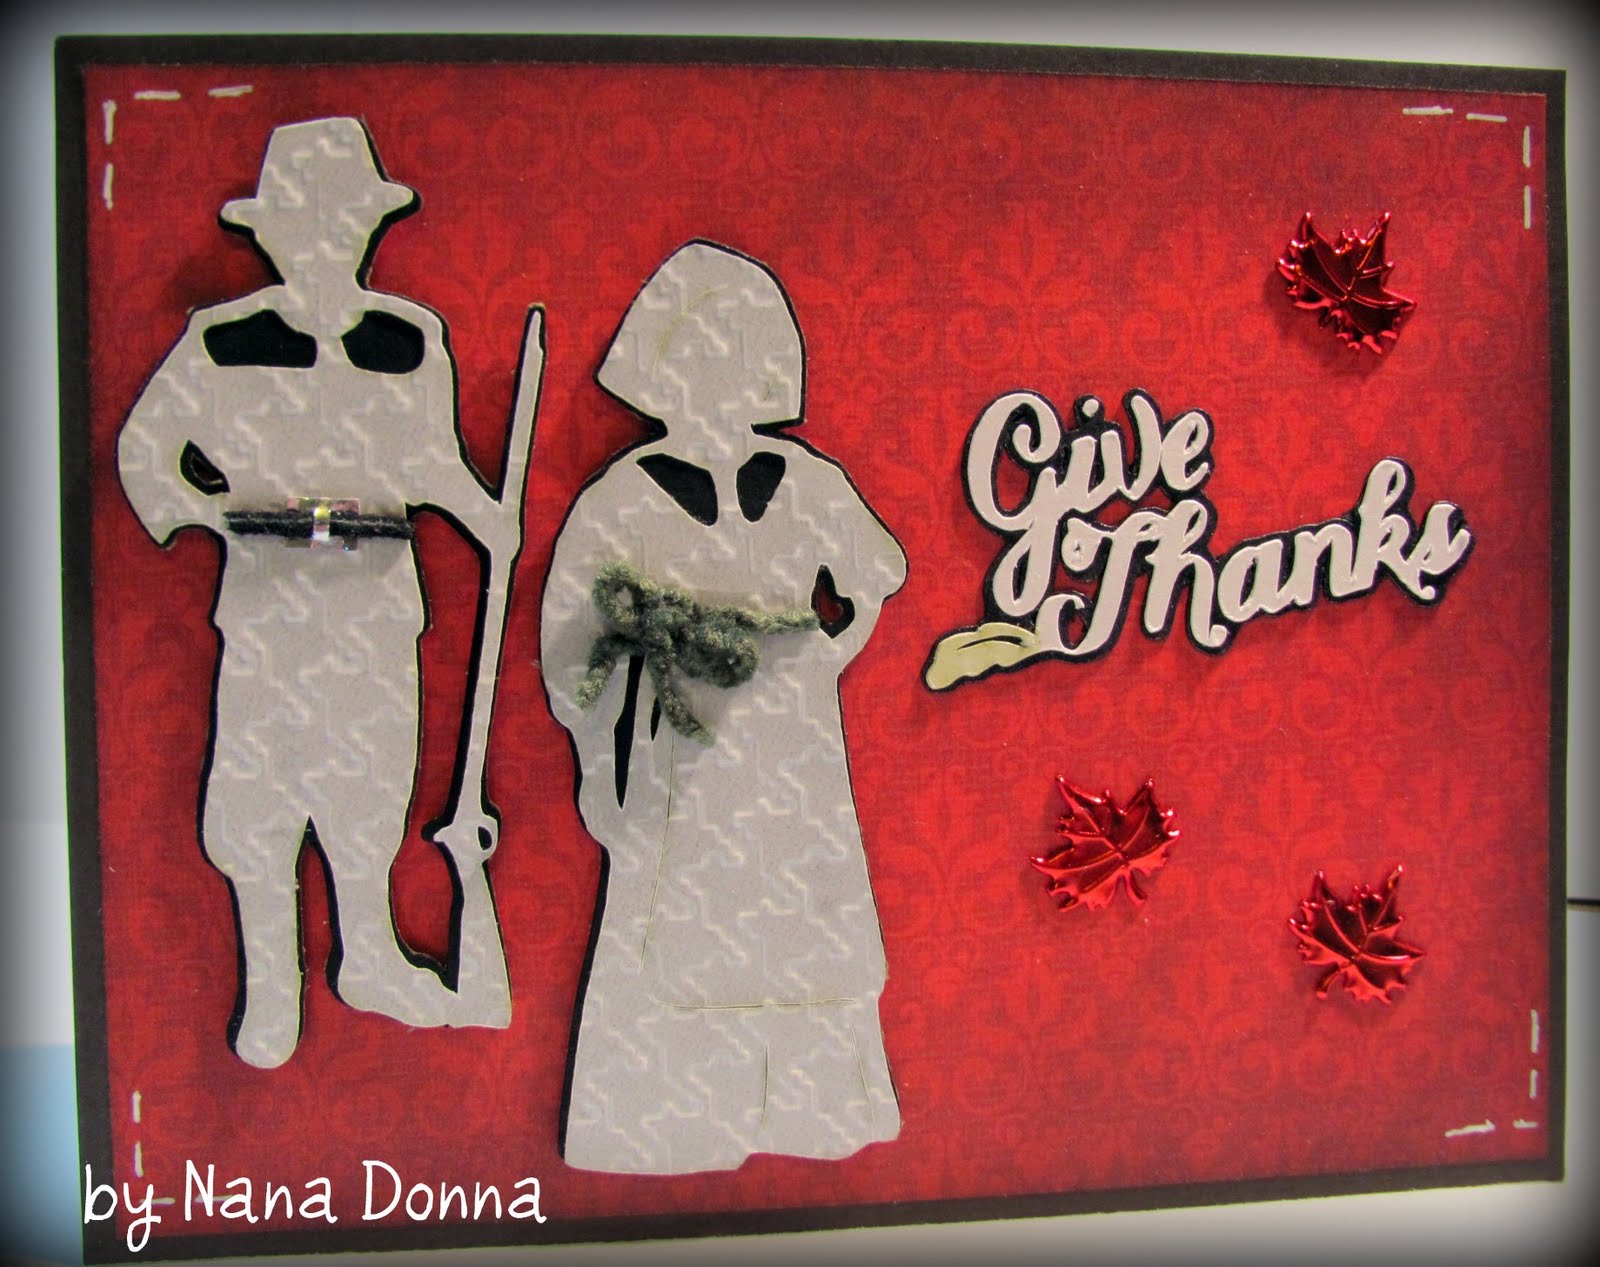
This is my first time participating in the Cricut Cradz Challenge.  This week the challenge was to make a fall card with out using brown, orange or yellow.  That was more difficult then it seems especially when trying to find fall patterned paper, one of those colors is almost always in there.   In the end though I think I did OK with this card, after all Thanksgiving is in the Fall.

I cut the Pilgrims (man & lady) are cut from A Child's Year, the shadow is heavy black paper and the top layer is from white vellum that I Cuttlebugged with the houndstooth folder.  Although you can't see it I inked the cut areas in an attempt to highlight them.  I made his belt using a piece of black rawhide and a small piece of silver paper for the buckle.  Her sash is green fiber cord.  I had all this part in my head but the hard part was deciding what to put next to them and in what color.  I probably cut out about 6 different things out of different colors (a normal for me LOL) and finally decided on this cut from Thanksgiving cartridge from pearl black & white paper.  The red leaves are brads that I cut the backs off of and glued down.
Sure hope this looks fall.
Here is a close up of the belt, not a very good picture but it gives you a better look at it.

September 9, 2010

A simple but lovely card

I am trying to post some of my older cards that I made before I started my blog, some of my favorites.
If you know me you know that one of my favorites "looks" is all white with  a touch of color.  I love the white to be embossed with the Cuttlebug.  This card is 6 x 5 1/2 which is bigger then a Cuttlebug folder (except for the new ones) so for the Swiss Dots part I had to emboss it in two steps.  I read on a blog a while back on how to do it without showing a line, sorry I don't remember who it was to give them credit.  The Swiss Dots part I Cuttlebuggesd as much as I could down one side/end, then turned the paper around and lined up the folder to do the other end.  The trick to not get a line where is joins is to run it through the CB just to where the other stops and back up the Cuttlebug, so not go over the same area again or you will get a flat mark.  I hope this makes sense.  The left side of the card I embossed using my Martha Stewart scoring board turning the paper on an angel.   The paper is very pretty pearlescense white.

The turquoise strip and the butterfly is from some paper that I made/colored using Tim Holtz Alcohol inks on photo glossy paper.  The butterfly is a Martha Stewart punch, punched twice, added some pearls to the center for more dimension.  Then I happen to have the pleated ribbon that I got in the dollar bin at Michaels that matched perfect.  Don't ya just love when that happens :)!

I hope you enjoy this card as much as I did making it.  I love your comments and look forward to reading them.


Here is a close up of the butterfly so you can really see the colors on the paper.

September 7, 2010

Happy Birthday Tag Card

This card was made using one of the sketches at RAQ's Challenge this week on the Cricut message board.  It also uses the colors from the Ad Color Challenge which are; robin egg, bubblegum and off white. 
I wish that the sparkly would show up better in the picture, I sprayed all the pieces with Glimmer Mist, so the card has a glimmer to it.  The tags were cut from Tags, Bags, Boxes and More cartridge at 4 x 2 inches.  I torn some paper from K & Company Gypsy Baby paper pad and covered the tags with the pieces, it was like putting a puzzle together.   I Cuttlebugged the back ground paper with the new 5 x 7 Polka Dots folder,  then distress the edges of the  with Tim Holtz distress tool.  I love that they are coming out with larger folders as I like to make my cards bigger then the A2 size some times.  This card is 5 x 7.
The brads I had just picked up at Michael's last week and the colors fit perfectly into the Ad challenge.  I also FINALLY got an i-Rock by Imaginisce, I had been wanting one for a while but every time  I went to Michaels with my coupon they did not have any.   So I just had to use it and add some more bling to this card :).  Happy Birthday is from an older Stampin Up set.    What do you think, it reminded me of a baby card (the colors)and I was going to make it into one but didn't know when I would use it so it ended up as Happy Bday.

September 6, 2010

Trick or Treat

You know I have never made a Halloween card before because I thought "who am I going to give a Halloween card to?"   Well at RAQ's Challenge this week one of the extra credits was to make a holiday card, any holiday, I recently got DCWV Autumn stack and there were a couple Halloween papers in there, so I thought I would give a Halloween card a try. 
I am so so excited on how this one turned out, it is so cute!  The background web paper is from that DCWV stack and so is the "trick or treat" and I faux stitched with a white open around the edges.   The Happy Halloween is cut from Wild Card out of holographic paper, the same orange paper that is behind the trick or treat.  The white strip that goes across on an angel was just a piece of white card stock but I wanted it to be a little glittery so I had some diamond colored fabric glue so I spread it on the paper and it came out great.  Because it was fabric paint it left the paper very pliable.  I think I discovered something new :)!

The Mummy I cut from Paper Doll Dress Up at about 2 1/4 inches and inked his wrapping lines with gray ink to highlight them, added him some black pearl eyes. 

The spider and web were also cut from Paper Doll Dress Up at about
1 1/4 inches.  The spider is cut twice from black glossy paper and then pop dotted on top of the web.  I hung him from a piece of very light gray sheer ribbon to look like he was hanging from a web. 

I hope you like him as much as I do, almost to much to give away LOL, but I do have someone in mind to send it too!

September 4, 2010

Spoil Yourself Silly - Prismapencils MCPT

I receive images every month from Aprile on the Cricut message board, that we are suppose to color using pencils and Odorless Minerals Spirits or MCPT (magic color pencil technique).  If you want more info on this challenge just let me know.   Once we color the image we are to make a card and post it on the message board.  This technique is a lot of fun and produces some very nice results.  This month (August, I am late) I really struggled with this image but in the end I am pretty pleased with it.

I colored the kitty image using my Prismacolor pencils and blended it using the gamsol or OMS and blending stumps.   I cut the image out using Spellbinders label ten and then cut the blue label the next size up.  I Cuttlebugged the blue label but you can't really see it.  The balloons I cut using "Alphallicous" cartridge, 3 for the red one and 2 for the blue & yellow, popped the layers and added Glossy Accents to the top layer, with a small amount of stickles glitter for shading.    Then I tied string to the balloons and tied all three strings in a know and glued it to the card.   This is an odd sized card it is 8 1/2 x 4 1/4, a little wider and shorter then the #10 size envelope so I made my own envelope.    I tried so hard to keep this card male looking, and I think I did!  Would love to read your comments they are always appreciated.

***Let it Snow****

I love the way this card came out.  I made it for one of the sketches this week on the Cricut Message board RAQ's Challenge.  The snowflakes were cut from a variety of cartridges, Accent Essentials, A Child's Year (yes there is a snowflake on there) and Don Juan.  I glued them and sprinkled course white glitter on them, the silver one is Martha Stewart glitter.  And added small pearls to the center for more bling.  The tag I cut using the tag feature on A Child's Year and stamped a snowman which I heat embossed with silver.  The saying is a Stampin Up stamp from a past Christmas set. 

The blue strip across the bottom, I Cuttlebugged using Sizzix snowflake folder and sanded it off to show the white core.  This card is very sparkly in person as I sprayed it all with Tattered Angel - Marshmallow, which is quickly becoming my favorite color.   Thanks for visiting and taking a look.

September 1, 2010

Black White & Hot Pink

Since I haven't made a card lately, (messing with that new puter LOL) so I thought I would post one of my oldies.  I made this card a while back but I still love this color combination.  The papers are a little busy but I think it still looks good.  The black & white paper is from a paper pack I bought at Wal Mart and then just mixed it with the plain hot pink.  The happy birthday is from Zooballo cartridge and of course the circle is from George,  Thanks for stopping by to look at one of oldies.  I think I will continue to add some of my oldies as I go.